Step 4: Add the Chart Archive to a Release
Next, add the Helm chart archive to a new release for the application in the Replicated vendor platform.
The purpose of this step is to configure a release that supports installation with KOTS. Additionally, this step defines a user-facing application configuration page that displays in the KOTS Admin Console during installation where users can set their own Grafana login credentials.
To create a release:
-
In the
grafanadirectory, create a subdirectory namedmanifests:mkdir manifestsYou will add the files required to support installation with Replicated KOTS to this subdirectory.
-
Move the Helm chart archive that you created to
manifests:mv grafana-9.6.5.tgz manifests -
In the
manifestsdirectory, create the following YAML files to configure the release:cd manifeststouch kots-app.yaml k8s-app.yaml kots-config.yaml grafana.yaml -
In each file, paste the corresponding YAML provided in the tabs below:
- kots-app.yaml
- k8s-app.yaml
- kots-config.yaml
- grafana.yaml
Description
The KOTS Application custom resource enables features in the Admin Console such as branding, release notes, port forwarding, dashboard buttons, application status indicators, and custom graphs.
The YAML below provides a name for the application to display in the Admin Console, adds a custom status informer that displays the status of the
grafanaDeployment resource in the Admin Console dashboard, adds a custom application icon, and creates a port forward so that the user can open the Grafana application in a browser.YAML
apiVersion: kots.io/v1beta1
kind: Application
metadata:
  name: grafana
spec:
  title: Grafana
  statusInformers:
    - deployment/grafana
  ports:
    - serviceName: "grafana"
      servicePort: 3000
      localPort: 8888
      applicationUrl: "http://grafana"
  icon: https://raw.githubusercontent.com/cncf/artwork/master/projects/kubernetes/icon/color/kubernetes-icon-color.png
Description
The Kubernetes Application custom resource supports functionality such as including buttons and links on the Admin Console dashboard. The YAML below adds an Open App button to the Admin Console dashboard that opens the application using the port forward configured in the KOTS Application custom resource.
YAML
apiVersion: app.k8s.io/v1beta1
kind: Application
metadata:
  name: "grafana"
spec:
  descriptor:
    links:
      - description: Open App
        # needs to match applicationUrl in kots-app.yaml
        url: "http://grafana"
Description
The Config custom resource specifies a user-facing configuration page in the Admin Console designed for collecting application configuration from users. The YAML below creates "Admin User" and "Admin Password" fields that will be shown to the user on the configuration page during installation. These fields will be used to set the login credentials for Grafana.
YAML
  apiVersion: kots.io/v1beta1
  kind: Config
  metadata:
    name: grafana-config
  spec:
    groups:
      - name: grafana
        title: Grafana
        description: Grafana Configuration
        items:
          - name: admin_user
            title: Admin User
            type: text
            default: 'admin'
          - name: admin_password
            title: Admin Password
            type: password
            default: 'admin'
Description
The KOTS HelmChart custom resource provides instructions to KOTS about how to deploy the Helm chart.
The HelmChart custom resource below contains a
valueskey, which creates a mapping to the Grafanavalues.yamlfile. In this case, thevalues.admin.userandvalues.admin.passwordfields map toadmin.userandadmin.passwordin the Grafanavalues.yamlfile.During installation, KOTS renders the ConfigOption template functions in the
values.admin.userandvalues.admin.passwordfields and then sets the corresponding Grafana values accordingly.YAML
apiVersion: kots.io/v1beta2
kind: HelmChart
metadata:
  name: grafana
spec:
  # chart identifies a matching chart from a .tgz
  chart:
    name: grafana
    chartVersion: 9.6.5
  values:
    admin:
      user: "repl{{ ConfigOption `admin_user`}}"
password: "repl{{ ConfigOption `admin_password`}}" -
From the
manifestsdirectory, lint the YAML files to confirm that there are no errors:replicated release lint --yaml-dir .--yaml-diris the path to the directory that contains the Helm chart archive and the manifest files required by KOTS.Example output:
RULE                               TYPE    FILENAME        LINE  MESSAGE
preflight-spec                     warn                          Missing preflight spec
troubleshoot-spec                  warn                          Missing troubleshoot spec
nonexistent-status-informer-object warn kots-app.yaml 8 Status informer points to a nonexistent kubernetes object. If this is a Helm resource, this warning can be ignored.noteThe output includes warning messages that list missing manifest files. These manifests control additional KOTS functionality and can be ignored for the purpose of this tutorial. The
nonexistent-status-informer-objectwarning can also be ignored because thegrafanaDeployment resource that was added as a status informer in the KOTS Application custom resource is a Helm resource. -
Create a release:
replicated release create --yaml-dir .Example output:
• Reading manifests from . ✓
• Creating Release ✓
• SEQUENCE: 1 -
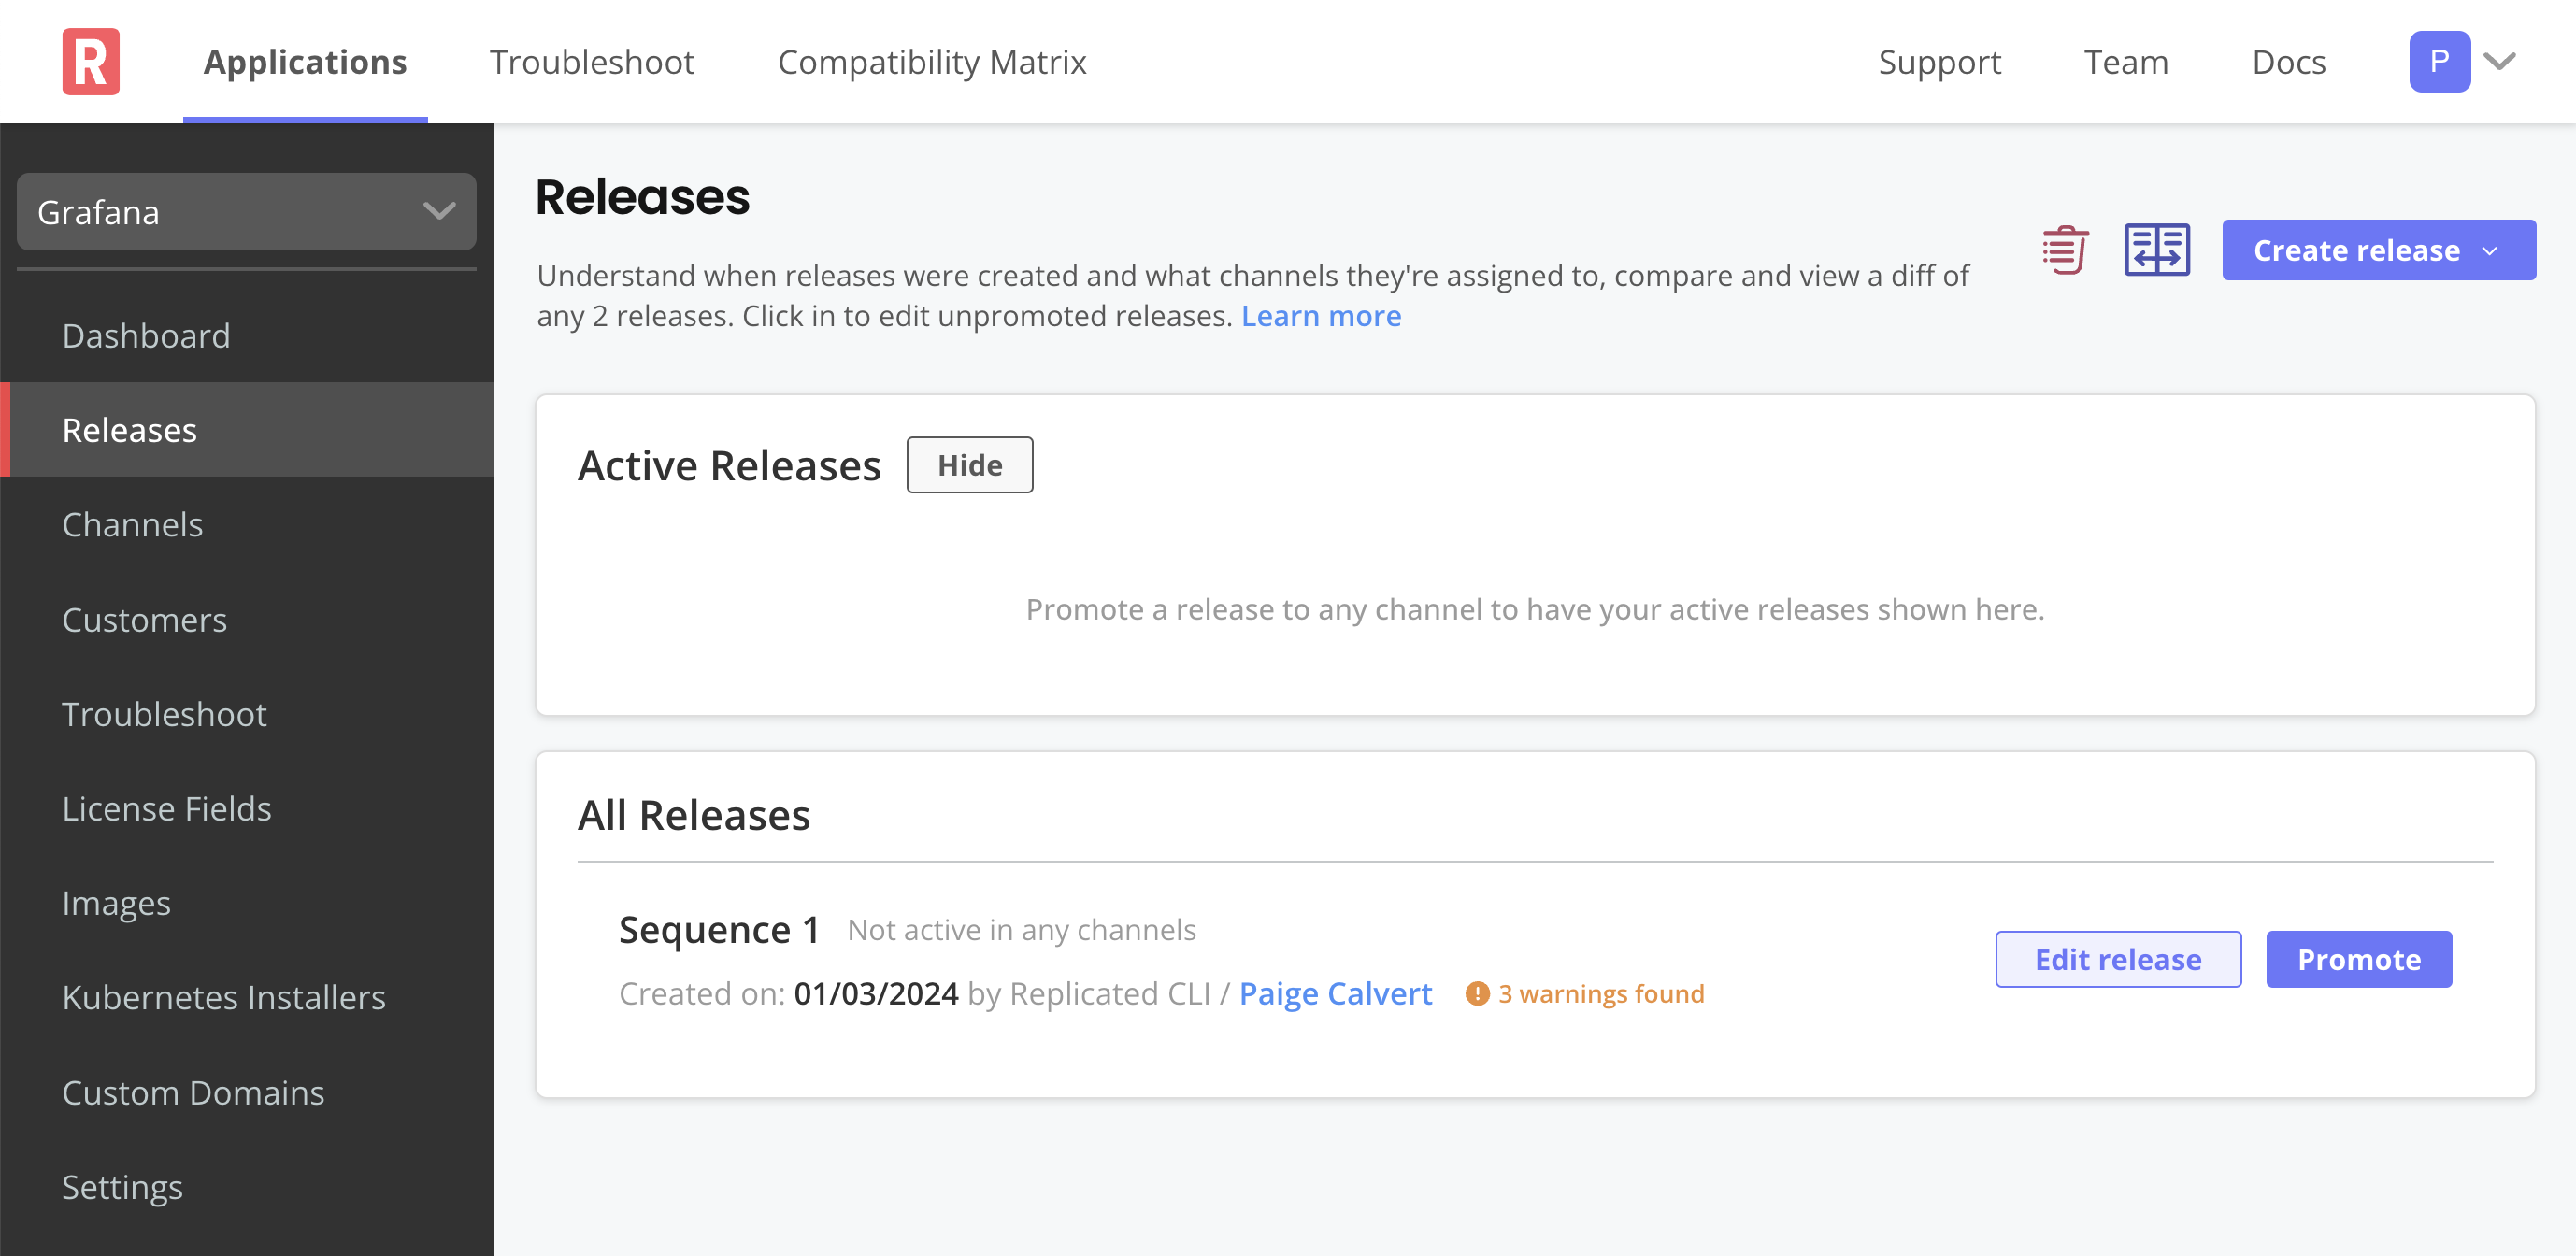
Log in to the Vendor Portal and go to Releases.
The release that you created is listed under All releases.
-
Click Edit release to view the files in the release.
In the release editor, you can see the manifest files that you created, the Helm chart
.tgzarchive, and theChart.yamlandvalues.yamlfiles for the Grafana Helm chart. You can also see the same warning messages that were displayed in the CLI output.
-
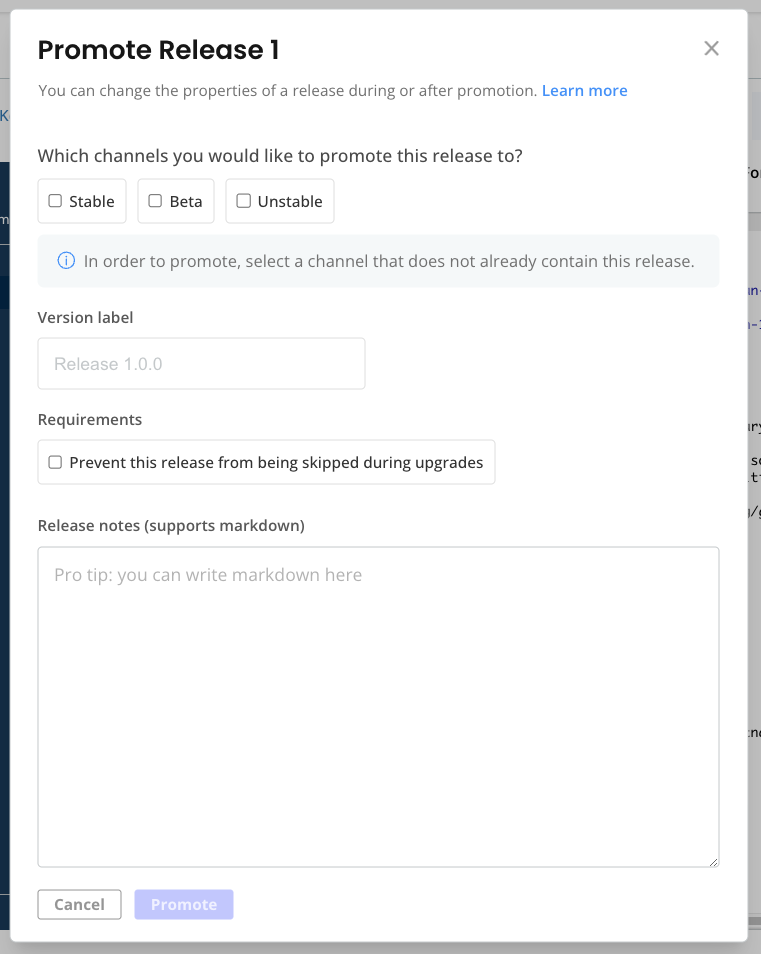
At the top of the page, click Promote.
-
In the dialog, for Which channels you would like to promote this release to?, select Unstable. Unstable is a default channel that is intended for use with internal testing. Click Promote.
Next Step
Create a customer with the KOTS entitlement so that you can install the release in your cluster using Replicated KOTS. See Step 5: Create a KOTS-Enabled Customer.