Online Installation in Existing Clusters with KOTS
This topic describes how to use Replicated KOTS to install an application in an existing Kubernetes cluster.
Prerequisites
Complete the following prerequisites:
-
Ensure that your cluster meets the minimum system requirements. See Minimum System Requirements in Installation Requirements.
-
Ensure that you have at least the minimum RBAC permissions in the cluster required to install KOTS. See RBAC Requirements in Installation Requirements.
noteIf you manually created RBAC resources for KOTS as described in Namespace-scoped RBAC Requirements, include both the
--ensure-rbac=falseand--skip-rbac-checkflags when you run thekots installcommand.These flags prevent KOTS from checking for or attempting to create a Role with
* * *permissions in the namespace. For more information about these flags, see install or admin-console upgrade. -
Review the options available with the
kots installcommand before installing. Thekots installcommand includes several optional flags to support different installation use cases. For a list of options, see install in the KOTS CLI documentation.
- Download your license file. Ensure that you can access the downloaded license file from the environment where you will install the application. See Downloading Customer Licenses.
Install
To install KOTS and the application in an existing cluster:
-
Run one of these commands to install the Replicated KOTS CLI and KOTS. As part of the command, you also specify a name and version for the application that you will install.
-
For the latest application version:
curl https://kots.io/install | bash
kubectl kots install APP_NAME -
For a specific application version:
curl https://kots.io/install | bash
kubectl kots install APP_NAME --app-version-label=VERSION_LABEL
Replace, where applicable:
APP_NAMEwith the name of the application. TheAPP_NAMEis included in the installation command that your vendor gave you. This is a unique identifier that KOTS will use to refer to the application that you install.
VERSION_LABELwith the label for the version of the application to install. For example,--app-version-label=3.0.1.
Examples:
curl https://kots.io/install | bash
kubectl kots install application-name
curl https://kots.io/install | bash
kubectl kots install application-name --app-version-label=3.0.1 -
-
When prompted by the
kots installcommand:- Provide the namespace where you want to install both KOTS and the application.
- Create a new password for logging in to the Admin Console.
Example:
$ kubectl kots install application-name
Enter the namespace to deploy to: application-name
  • Deploying Admin Console
    • Creating namespace ✓
    • Waiting for datastore to be ready ✓
Enter a new password to be used for the Admin Console: ••••••••
  • Waiting for Admin Console to be ready ✓

  • Press Ctrl+C to exit
  • Go to http://localhost:8800 to access the Admin Console
After the
kots installcommand completes, it creates a port forward to the Admin Console. The Admin Console is exposed internally in the cluster and can only be accessed using a port forward. -
Access the Admin Console on port 8800. If the port forward is active, go to http://localhost:8800 to access the Admin Console.
If you need to reopen the port forward to the Admin Console, run the following command:
kubectl kots admin-console -n NAMESPACEReplace
NAMESPACEwith the namespace where KOTS is installed. -
Log in with the password that you created during installation.
-
Upload your license file.
-
On the config screen, complete the fields for the application configuration options and then click Continue.
-
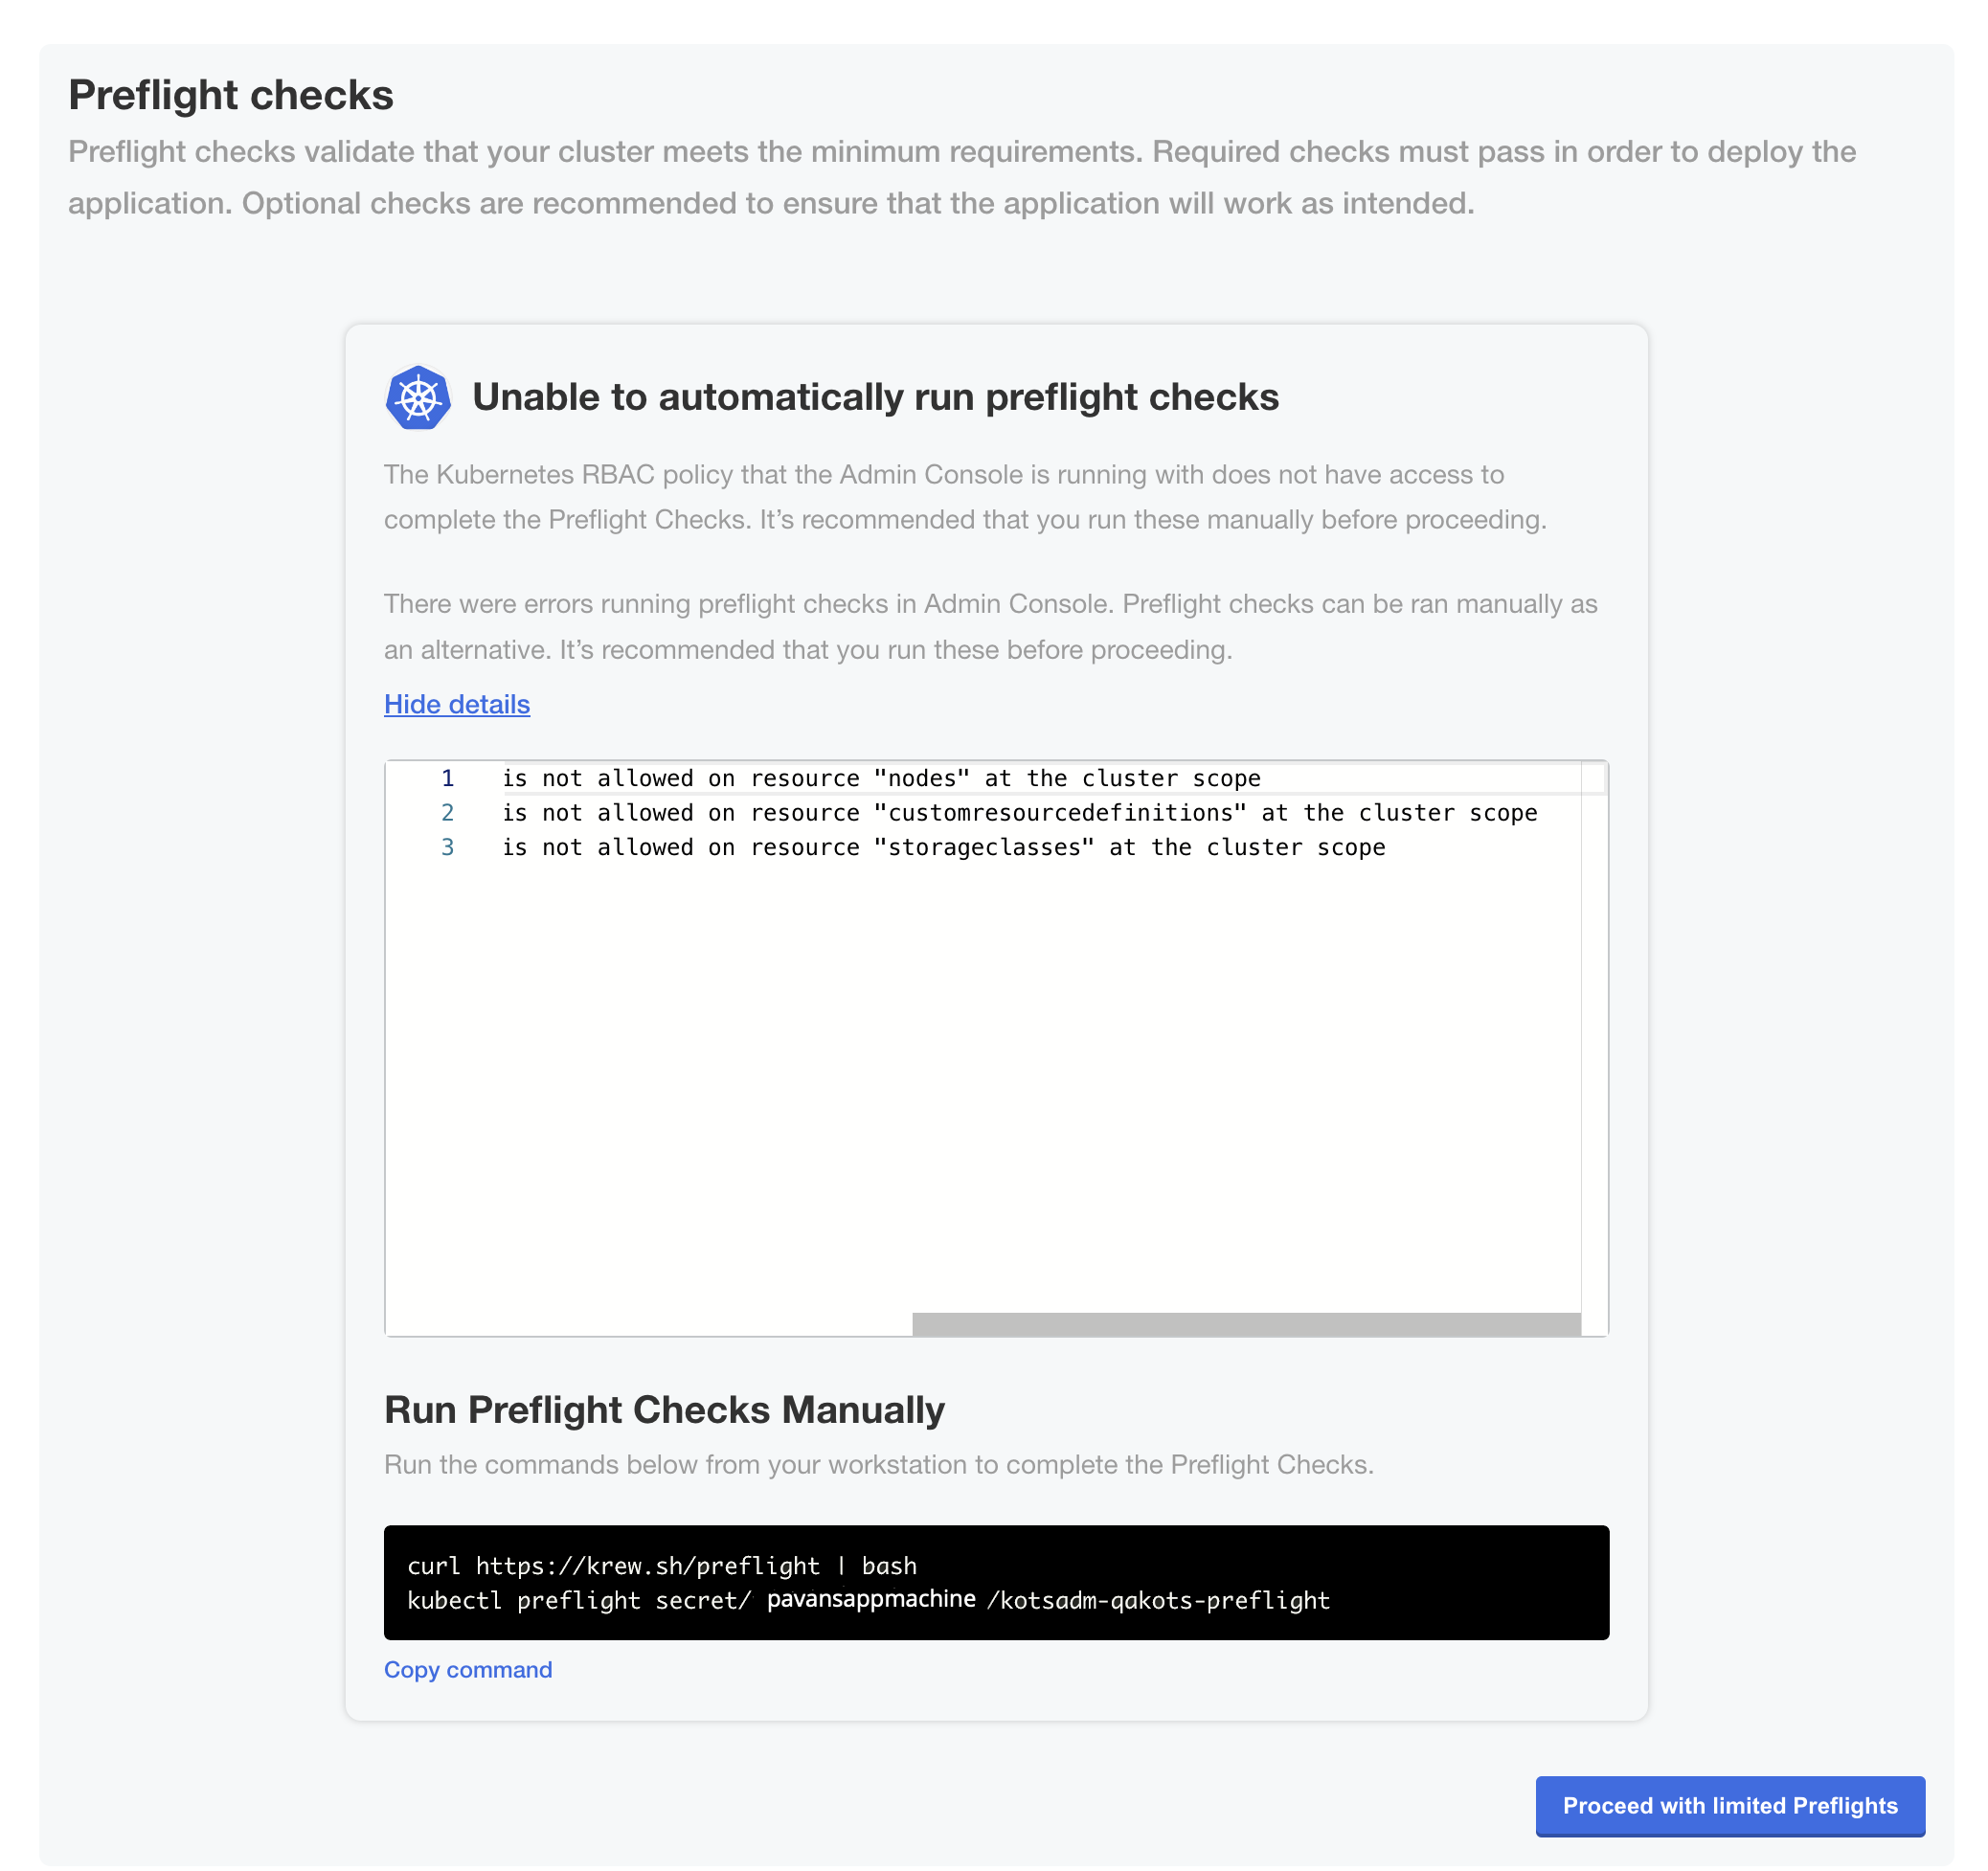
On the Preflight checks page, the application-specific preflight checks run automatically. Preflight checks are conformance tests that run against the target namespace and cluster to ensure that the environment meets the minimum requirements to support the application. Click Deploy.
noteReplicated recommends that you address any warnings or failures, rather than dismissing them. Preflight checks help ensure that your environment meets the requirements for application deployment.
-
(Minimal RBAC Only) If you are installing with minimal role-based access control (RBAC), KOTS recognizes if the preflight checks failed due to insufficient privileges. When this occurs, a kubectl CLI preflight command displays that lets you manually run the preflight checks. The Admin Console then automatically displays the results of the preflight checks. Click Deploy.
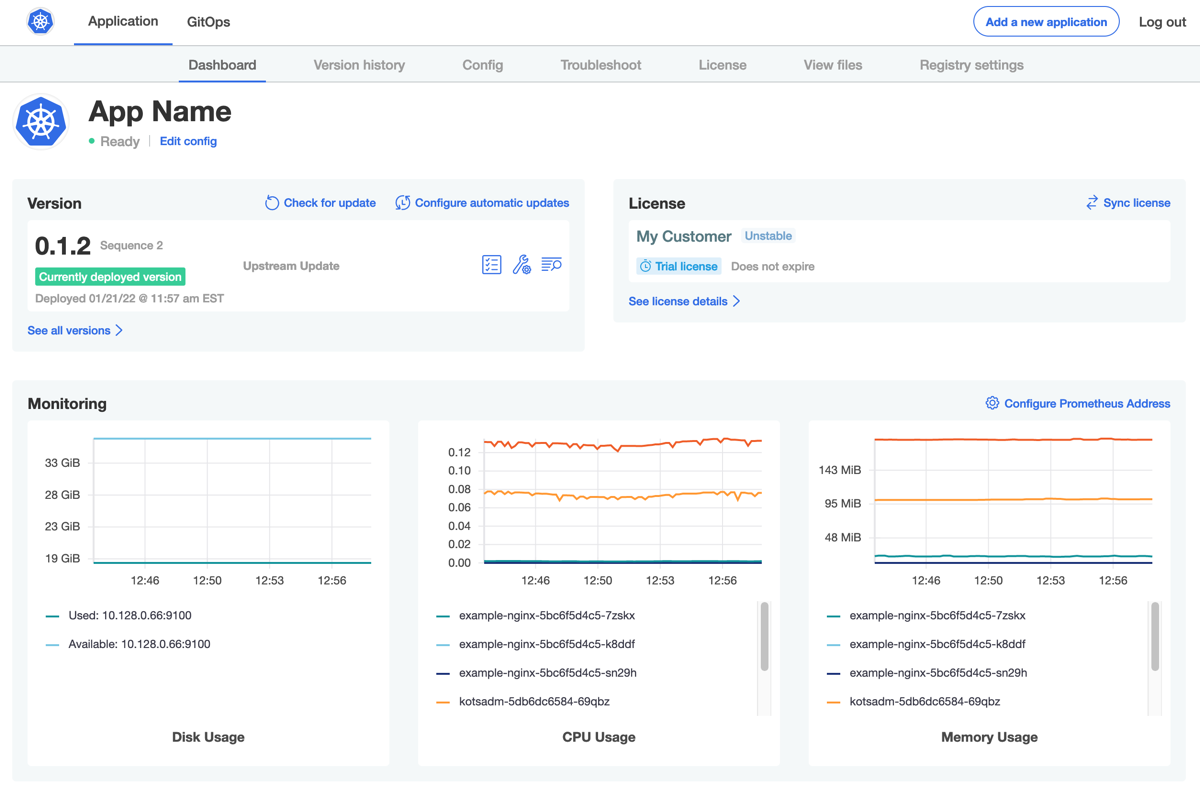
The Admin Console dashboard opens.
On the Admin Console dashboard, the application status changes from Missing to Unavailable while the Deployment is being created. When the installation is complete, the status changes to Ready. For example: