Step 5: Deploy the Application
After you run the installation script from the previous step, the KOTS Admin Console and Kubernetes are running, but the application is not deployed yet.
This procedure shows you how to deploy the application by logging into the Admin Console, uploading the license file that you created as part of Step 3: Create a Customer, completing the application configuration settings, and running the preflight checks.
To install and deploy the application:
-
In a browser, enter the URL
http://localhost:8800(existing clusters) orhttp://[ip-address]:8800(embedded clusters) and the password from Step 4: Install KOTS. -
(Embedded Clusters Only) On the Bypass Browser TLS warning page, click Continue to Setup.
-
(Embedded Clusters Only) On the HTTPS page, click Skip & continue to use the self-signed TLS certificate and omit the hostname.
-
On the Upload license page, select the customer license YAML file or drag and drop the license file from your desktop. Click Upload license.
The Admin Console can pull the application YAML and containers now.
-
On the configuration screen, select the Customize Text Inputs checkbox. In the Text Example field, enter any text. For example,
Hello.This page displays configuration settings that are specific to the application. Software vendors define the fields that are displayed on this page in the Config custom resource. For more information, see Config in Reference.
There are other example configuration options on this page. Feel free to explore and toggle some of the options. You can see the results of your changes later.
noteYou will customize what appears on this screen in a later step.
-
Click Continue.
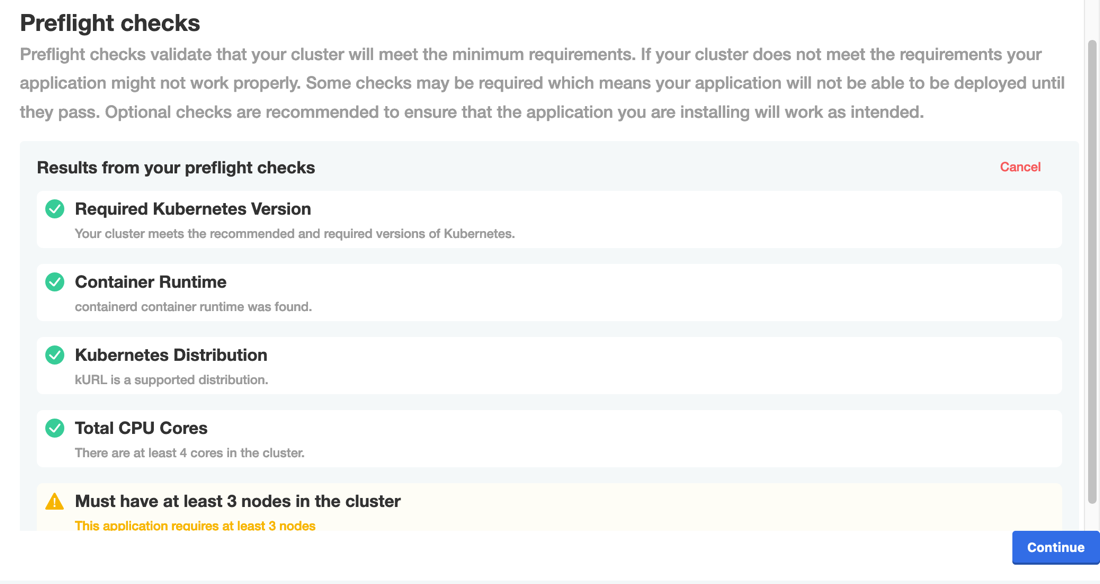
The preflight checks run automatically. In the Results from your preflight checks list, look for the status of the number of nodes in the cluster. It should show the pass or warning messages that you configured earlier, depending on your cluster setup.
-
Ignore any preflight warnings and click Continue. If there are failing preflight checks, click Deploy and continue in the dialog.
The Admin Console dashboard opens.
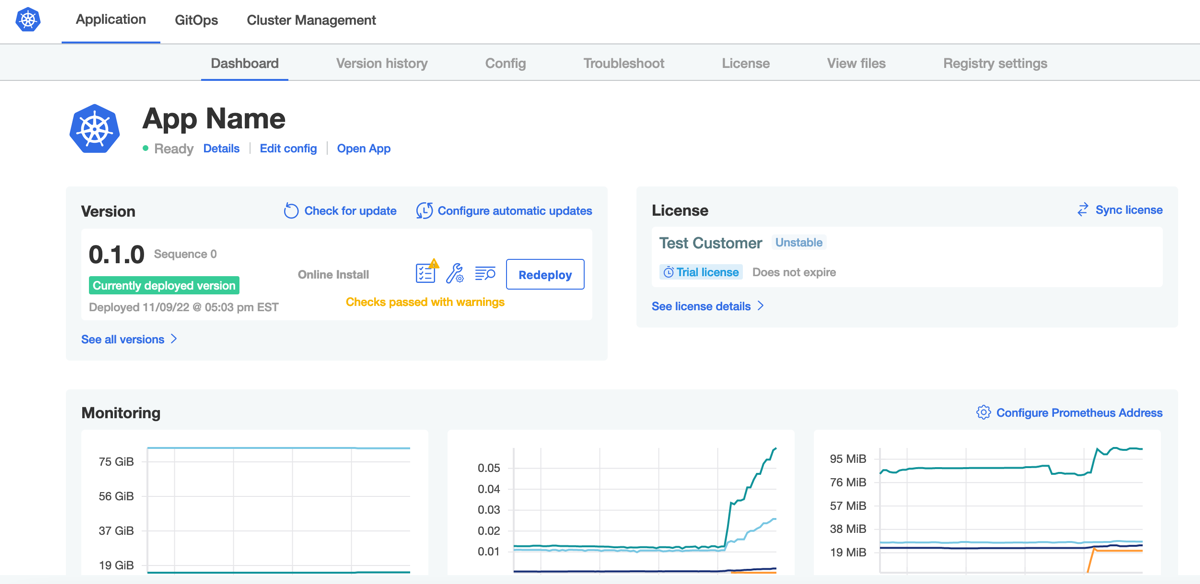
On the Dashboard tab, users can take various actions, including viewing the application status, opening the application, checking for application updates, syncing their license, and setting up application monitoring on the cluster with Prometheus.
-
Click Open App to view the application in your browser.
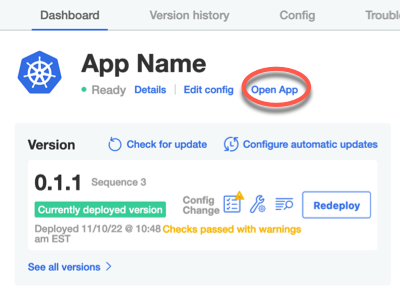
Notice that the text that you entered previously on the Configure App Name page is displayed on the application screen.
-
In your cluster, press Ctrl + C to exit the Admin Console.
-
Run the following command to reload your shell so that you can access the cluster with kubectl:
bash -l -
Run the following command to see the example NGINX service that you just deployed:
kubectl get pods --namespace NAMESPACE_NAMEReplace
NAMESPACE_NAMEwith the namespace where the application and Admin Console are deployed. Typically this value isdefault.Example output:
NAME                                 READY   STATUS    RESTARTS   AGE
kotsadm-7595595bf5-pmlng   1/1     Running   0          21m
kotsadm-minio-0            1/1     Running   0          22m
kotsadm-rqlite-0           1/1     Running   0          22m
nginx-667f4fc76b-8gvr9 1/1 Running 0 17m -
Run the following command to start the console again:
kubectl kots admin-console --namespace NAMESPACE_NAMEReplace
NAMESPACE_NAMEwith the namespace where the application and Admin Console are deployed. Typically this value isdefault.If you are using a VM that is behind a firewall and you get an error message, you might need to create a firewall rule to enable access to port 8800. For more information, see Installation Requirements.
-
Under Customers in the Vendor Portal, select the customer name to open the Reporting page. In the Instances pane, you can verify that the instance is active and drill down from the details area to see the Instance details page. For more information, see Customer Reporting and Instance Details.

Next Step
Continue to Step 6: Create a New Version to make a change to one of the manifest files and promote a new release.