Step 7: Install the Release with the Helm CLI
Next, install the same release using the Helm CLI. All releases that contain one or more Helm charts can be installed with the Helm CLI.
All Helm charts included in a release are automatically pushed to the Replicated registry when the release is promoted to a channel. Helm CLI installations require that the customer has a valid email address to authenticate with the Replicated registry.
To install the release with the Helm CLI:
-
Create a new customer to test the Helm CLI installation:
-
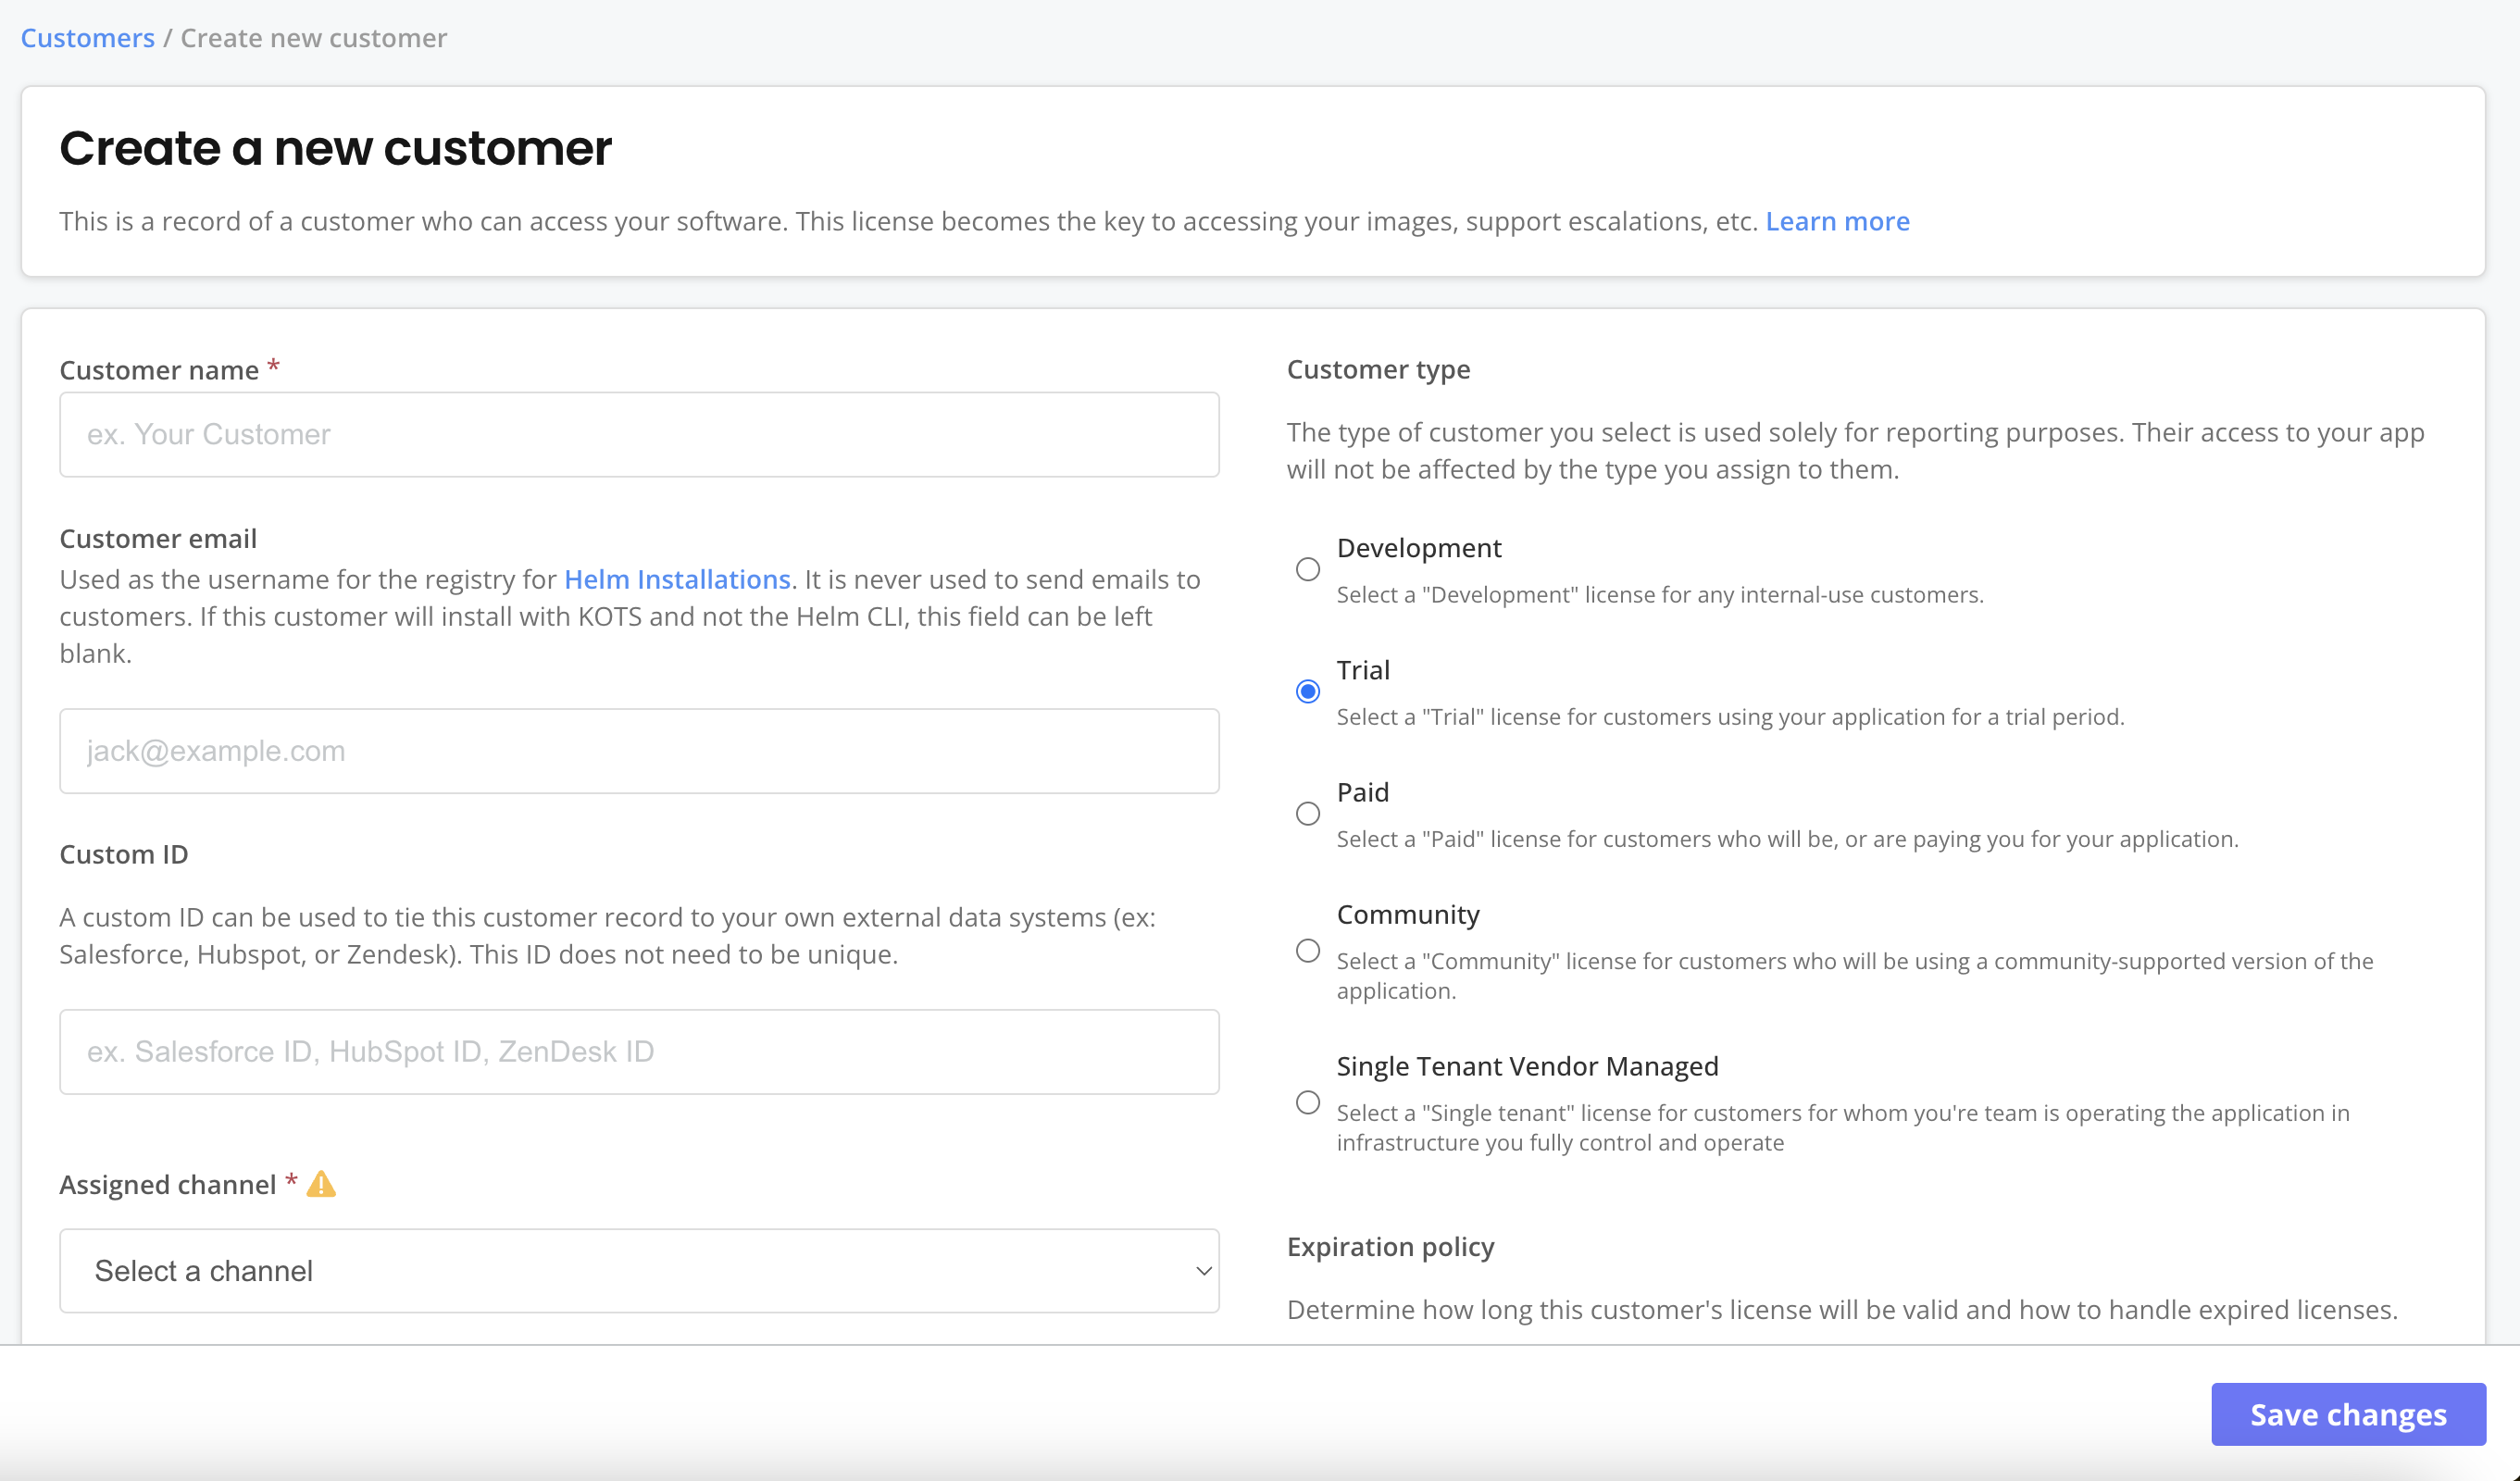
In the Vendor Portal, click Customers > Create customer.
The Create a new customer page opens:
-
For Customer name, enter a name for the customer. For example,
Helm Customer. -
For Channel, select Unstable. This allows the customer to install releases promoted to the Unstable channel.
-
For Customer email, enter the email address for the customer. The customer email address is required to install the application with the Helm CLI. This email address is never used send emails to customers.
-
For Customer type, select Trial.
-
(Optional) For License options, select the Existing Cluster (Helm CLI) entitlement.
-
Click Save Changes.
-
-
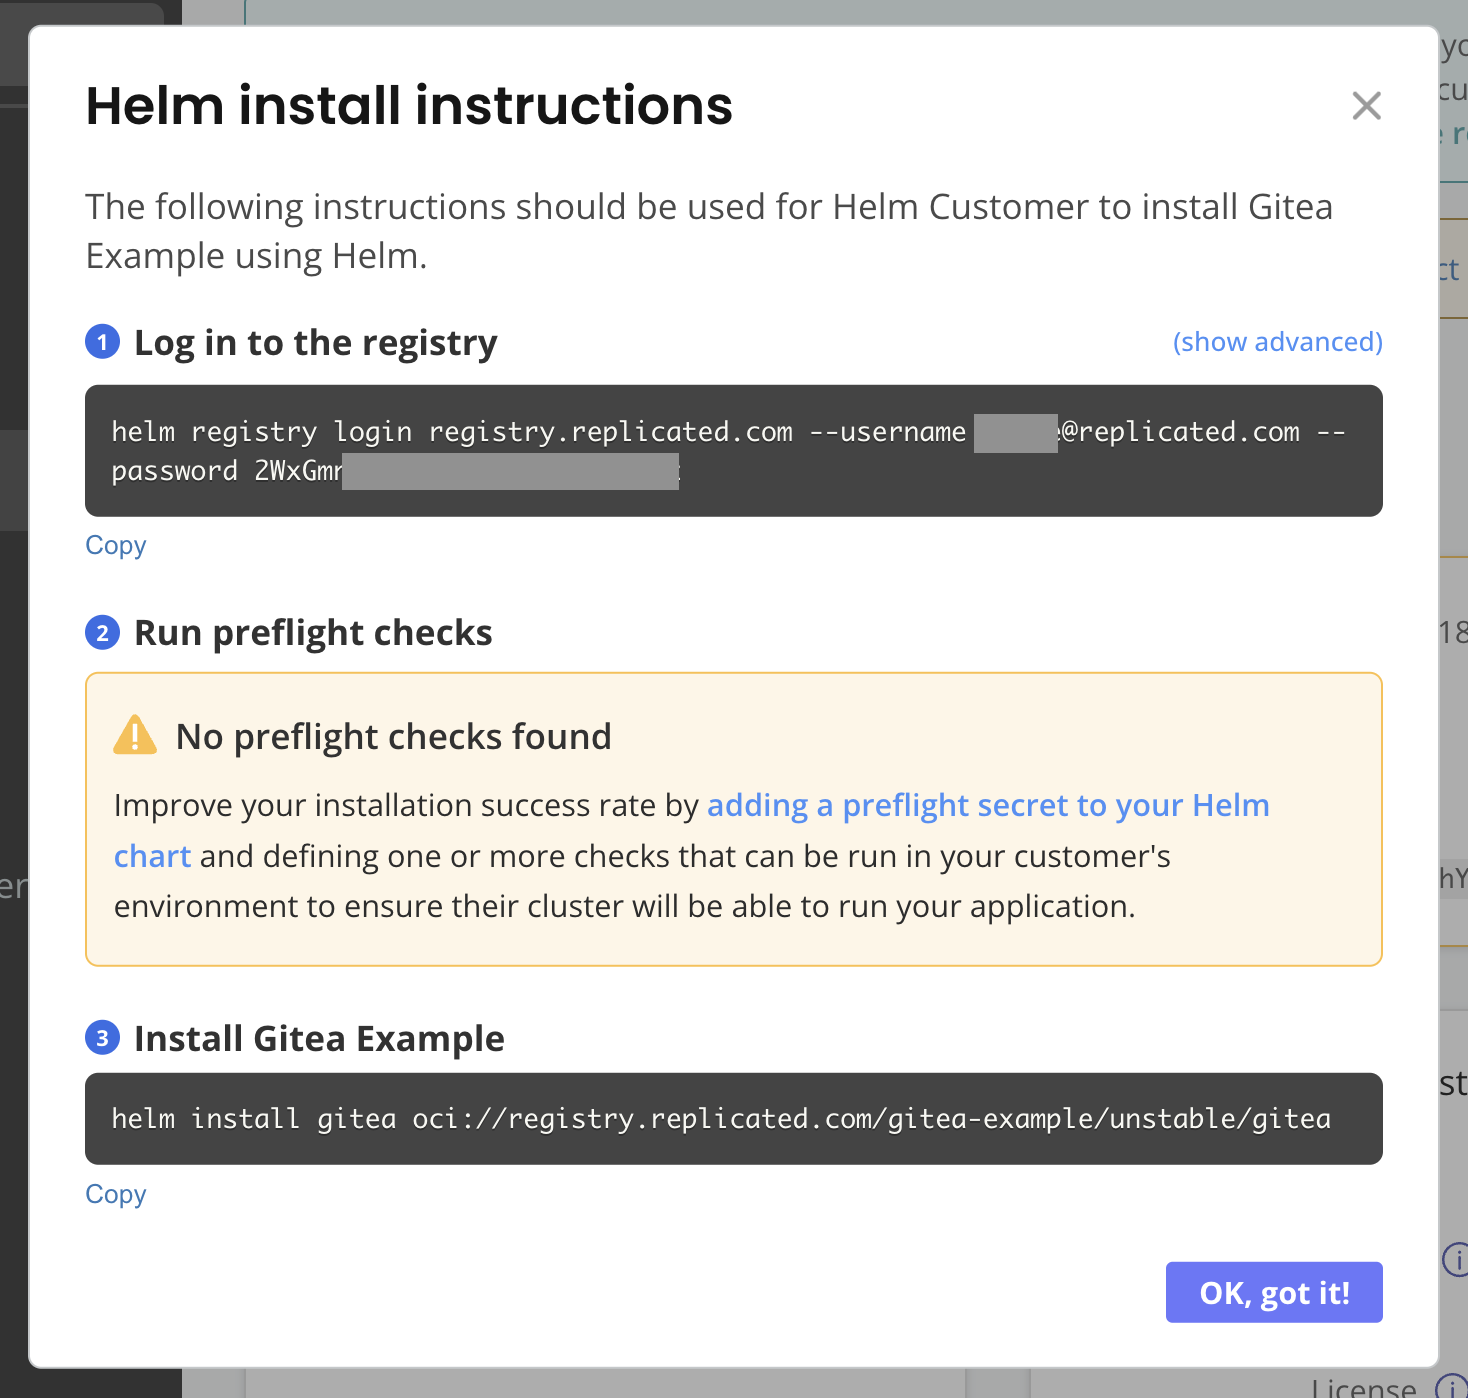
On the Manage customer page for the new customer, click Helm install instructions.

View a larger version of this image
You will use the instructions provided in the Helm install instructions dialog to install the chart.
-
Before you run the first command in the Helm install instructions dialog, create a
giteanamespace for the installation:kubectl create namespace gitea -
Update the current kubectl context to target the new
giteanamespace. This ensures that the chart is installed in thegiteanamespace without requiring you to set the--namespaceflag with thehelm installcommand:kubectl config set-context --namespace=gitea --current -
Run the commands in the provided in the Helm install instructions dialog to log in to the registry and install the Helm chart.
View a larger version of this image
noteYou can ignore the No preflight checks found warning for the purpose of this tutorial. This warning appears because there are no specifications for preflight checks in the Helm chart archive.
-
After the installation command completes, you can see that both the
giteaDeployment and the Replicated SDKreplicatedDeployment were created:kubectl get deployExample output:
NAME         READY   UP-TO-DATE   AVAILABLE   AGE
gitea        0/1     1            0           35s
replicated 1/1 1 1 35s -
Watch the
giteaLoadBalancer service until an external IP is available:kubectl get svc gitea --watch -
After an external IP address is available for the
giteaLoadBalancer service, follow the instructions in the output of the installation command to get the Gitea URL and then confirm that you can open the application in a browser. -
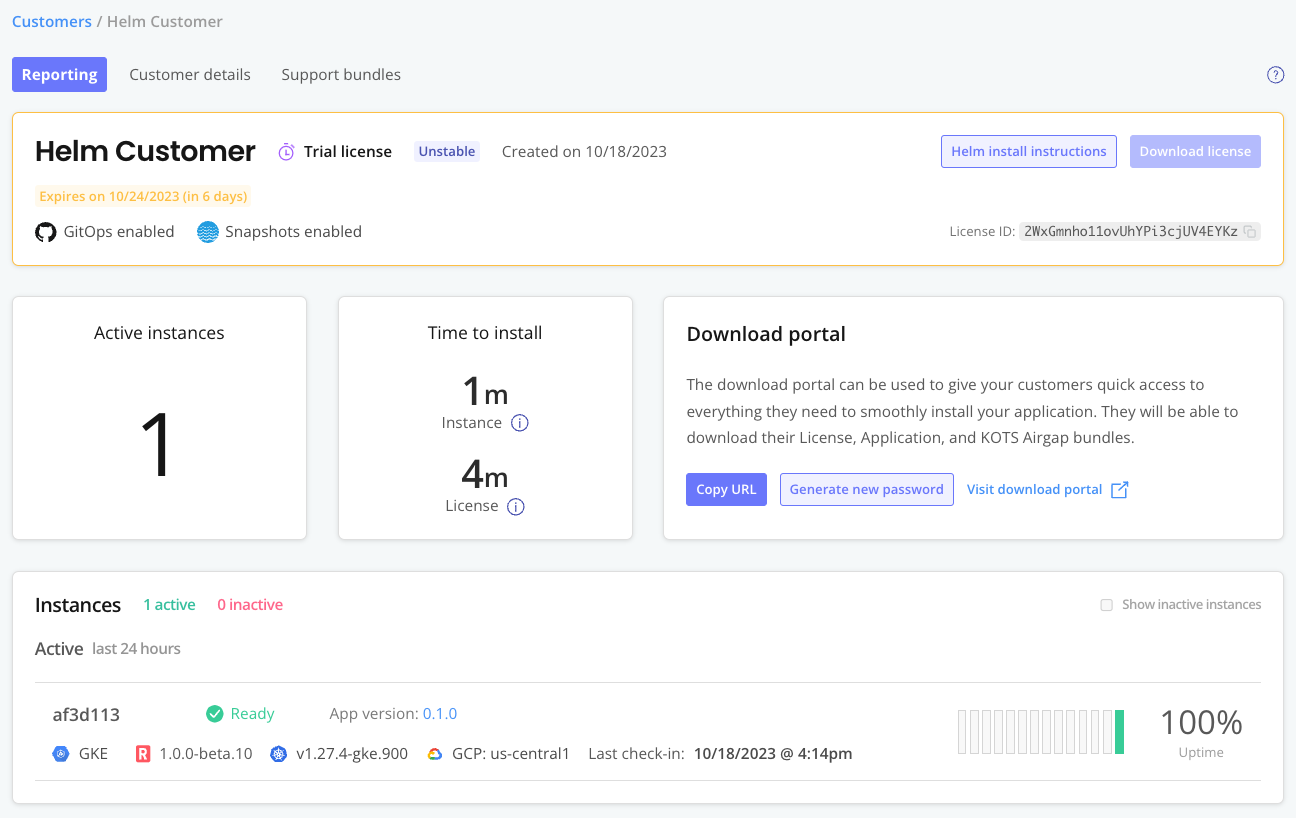
In another browser window, open the Vendor Portal and go to Customers. Select the customer that you created for the Helm CLI installation.
On the Reporting page for the customer, because the Replicated SDK was installed alongside the Gitea Helm chart, you can see details about the customer's license and installed instances:
-
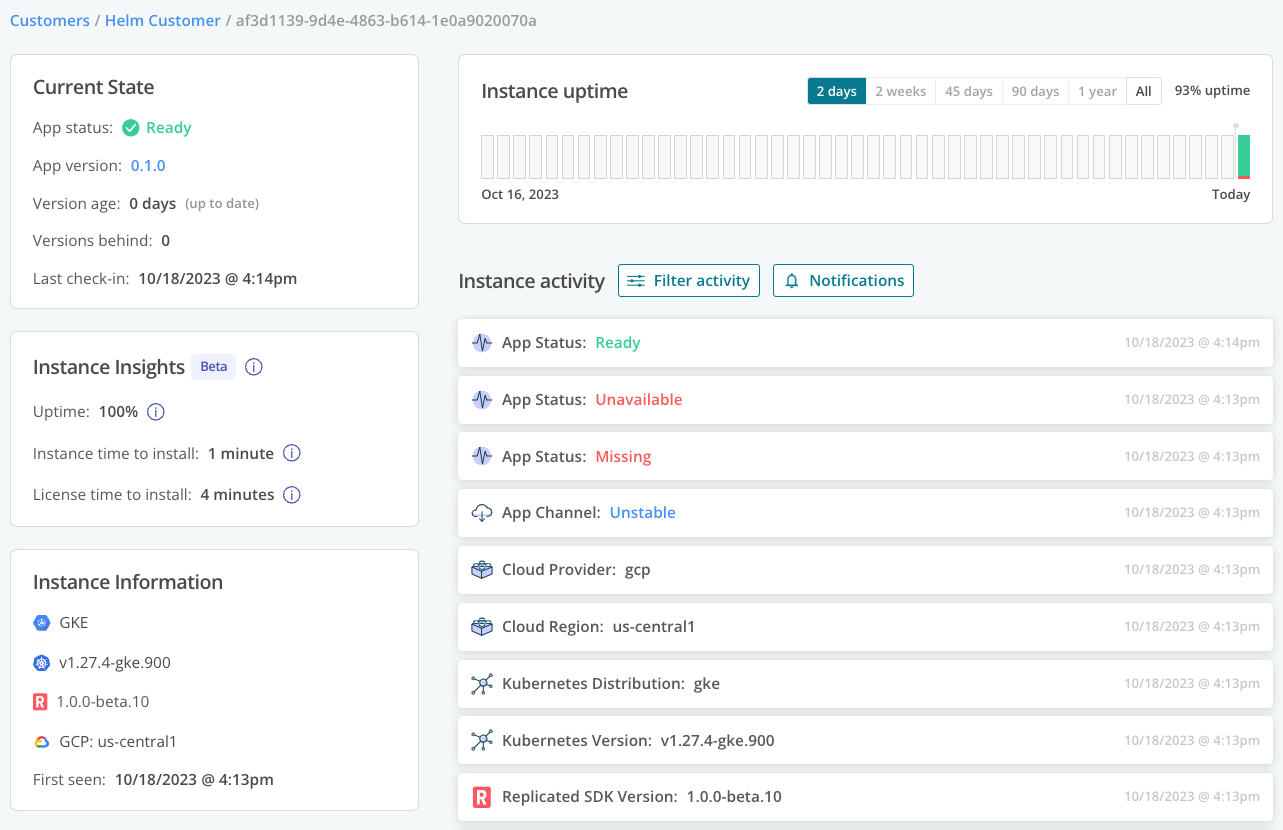
On the Reporting page, under Instances, click on the instance that you just installed to open the instance details page.
On the instance details page, you can see additional insights such as the cluster where the application is installed, the version of the Replicated SDK running in the cluster, instance status and uptime, and more:
-
Uninstall the Helm chart and the Replicated SDK:
helm uninstall gitea -
Delete the
giteanamespace:kubectl delete namespace gitea
Next Step
Congratulations! As part of this tutorial, you created a release in the Replicated Vendor Portal and installed the release with both KOTS and the Helm CLI.