Step 7: Configure the Application
After you install KOTS, you can log in to the KOTS Admin Console. This procedure shows you how to make a configuration change for the application from the Admin Console, which is a typical task performed by end users.
To configure the application:
-
Access the Admin Console using
https://localhost:8800if the installation script is still running. Otherwise, run the following command to access the Admin Console:kubectl kots admin-console --namespace NAMESPACEReplace
NAMESPACEwith the namespace where KOTS is installed. -
Enter the password that you created in Step 6: Install KOTS and the Application to log in to the Admin Console.
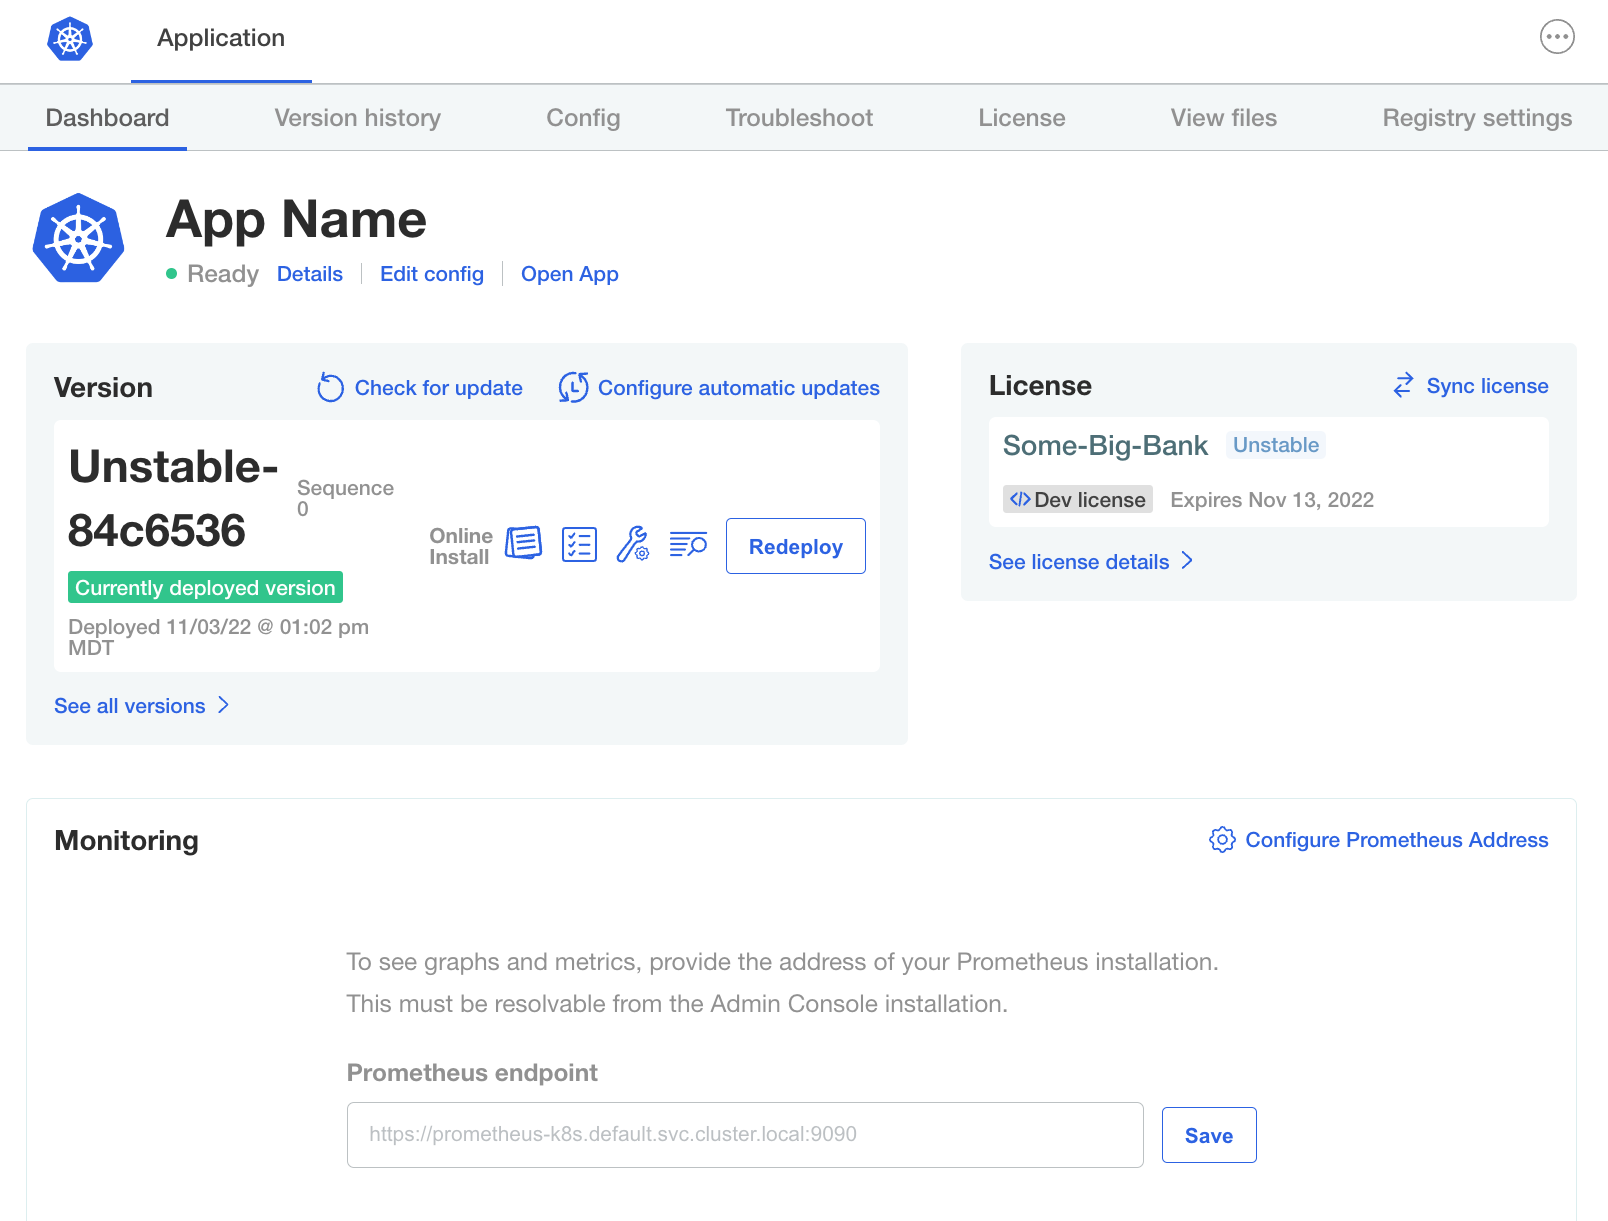
The Admin Console dashboard opens. On the Admin Console Dashboard tab, users can take various actions, including viewing the application status, opening the application, checking for application updates, syncing their license, and setting up application monitoring on the cluster with Prometheus.

-
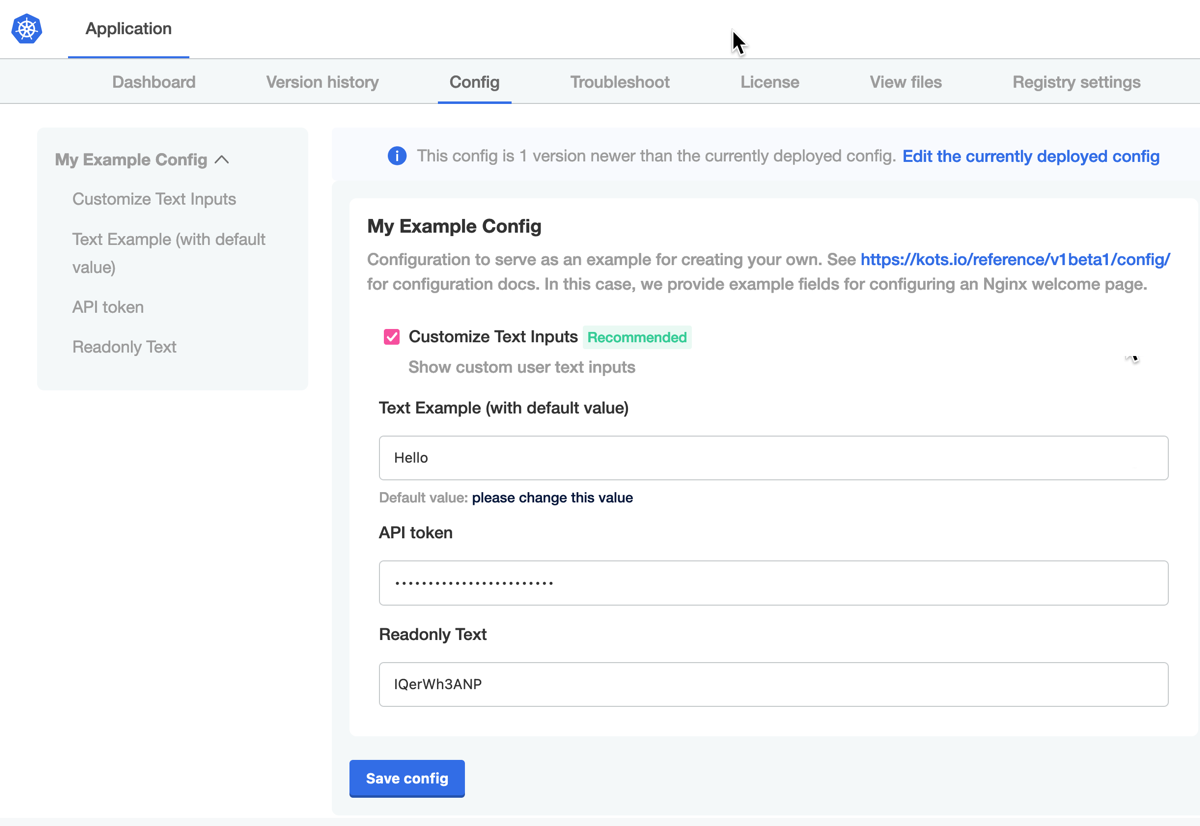
On the Config tab, select the Customize Text Inputs checkbox. In the Text Example field, enter any text. For example,
Hello.
This page displays configuration settings that are specific to the application. Software vendors define the fields that are displayed on this page in the KOTS Config custom resource. For more information, see Config in Reference.
-
Click Save config. In the dialog that opens, click Go to updated version.
The Version history tab opens.
-
Click Deploy for the new version. Then click Yes, deploy in the confirmation dialog.

-
Click Open App to view the application in your browser.

Notice the text that you entered previously on the configuration page is displayed on the screen.
noteIf you do not see the new text, refresh your browser.
Next Step
Continue to Step 8: Create a New Version to make a change to one of the manifest files for the cli-tutorial application, then use the Replicated CLI to create and promote a new release.