Manage releases with the Vendor Portal
This topic describes how to use the Replicated Vendor Portal to create and promote releases, edit releases, edit release properties, and archive releases.
For information about creating and managing releases with the CLI, see Manage Releases with the CLI.
For information about creating and managing releases with the Vendor API v3, see the releases and channelReleases sections in the Vendor API v3 documentation.
Create a release
To create and promote a release in the Vendor Portal:
-
From the Applications dropdown list, select Create an app or select an existing application to update.
-
Click Releases > Create release.
-
Add your files to the release. You can do this by dragging and dropping files to the file directory in the YAML editor or clicking the plus icon to add a new, untitled YAML file.
noteNew applications include example Kubernetes manifests (such as a ConfigMap, Deployment, and Service) and Replicated custom resource scaffolding (Application, Config, preflight, and support bundle specs) in the draft release.
To package your application for distribution, replace the example manifests with your Helm chart
.tgzarchive and the Replicated SDK as a subchart dependency. Keep and customize the Replicated custom resources to configure the Admin Console experience for your customers.If this is your first release, see Onboard to the Replicated Platform (Embedded Cluster v2) for step-by-step instructions on packaging your Helm chart with the Replicated SDK and creating your first release.
-
Click Save release. This saves a draft that you can continue to edit until you promote it.
-
Click Promote. In the Promote Release dialog, edit the fields:
For more information about the requirements and limitations of each field, see Release Properties in About Channels and Releases.
Field Description Channel Select the channel where you want to promote the release. If you are not sure which channel to use, use the default Unstable channel.
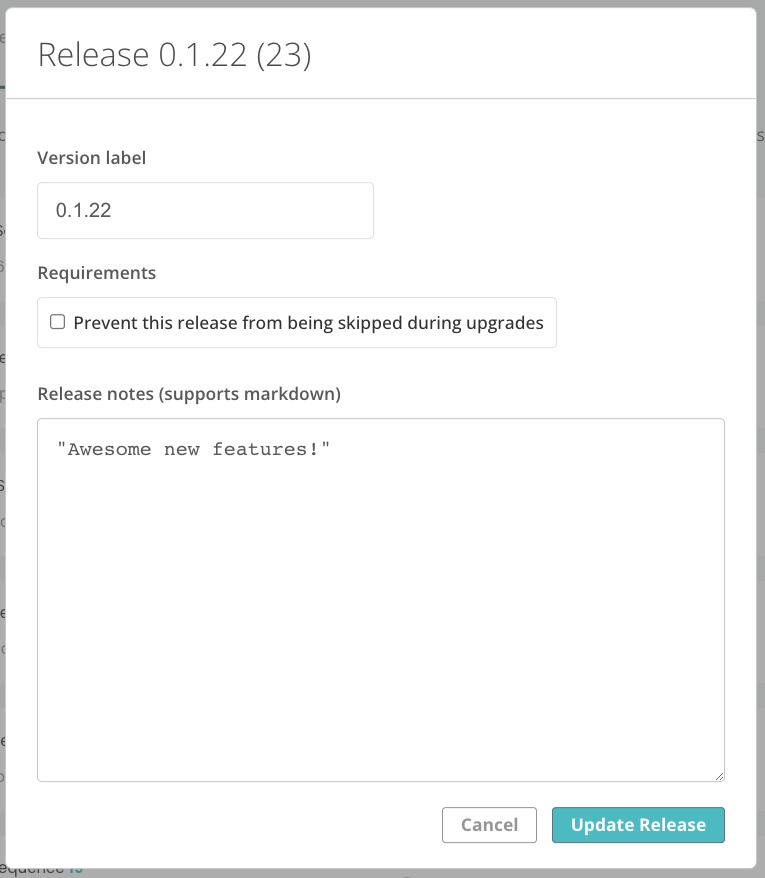
Version label Enter a version label.
If you have one or more Helm charts in your release, the Vendor Portal automatically populates this field. You can change the version label to any
versionspecified in any of theChart.yamlfiles included in the release.Requirements Select the Prevent this release from being skipped during upgrades to mark the release as required for KOTS installations. This option does not apply to installations with Helm.
Release notes Add release notes. The release notes support markdown and are shown to your customer. -
Click Promote.
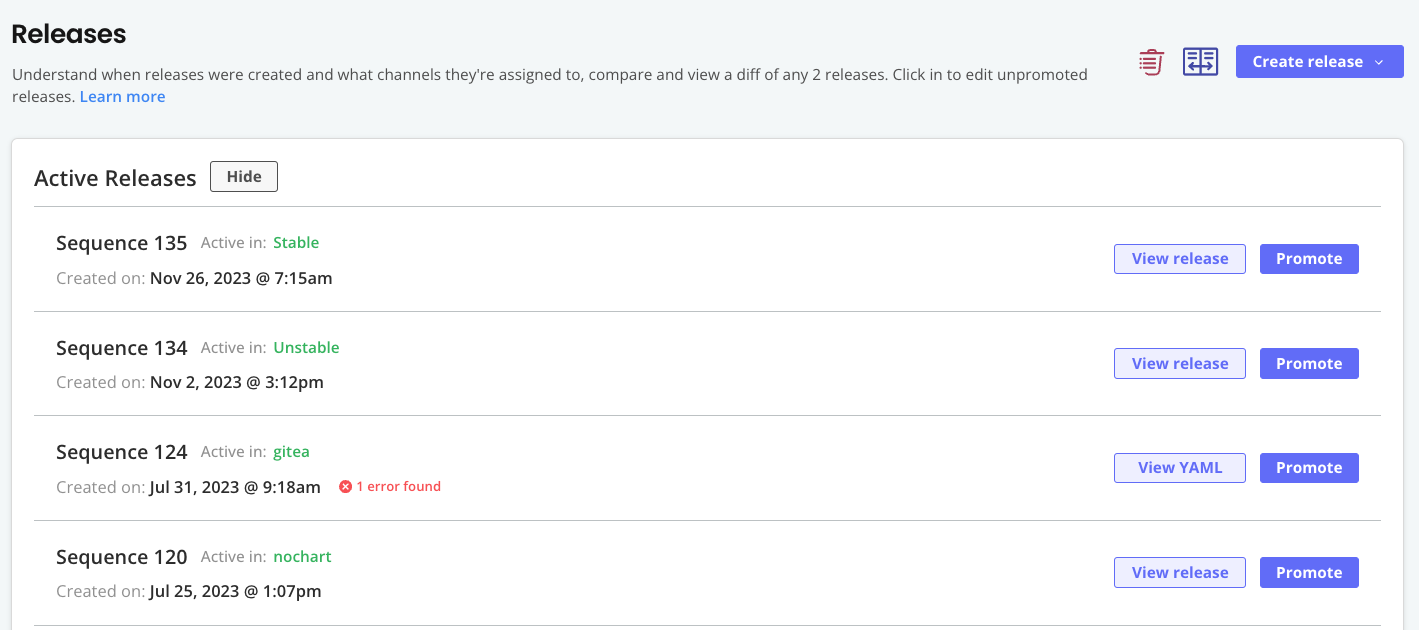
The release appears in an Active state on the Releases page.
Edit a draft release
To edit a draft release:
-
From the Applications dropdown list, select an existing application to update.
-
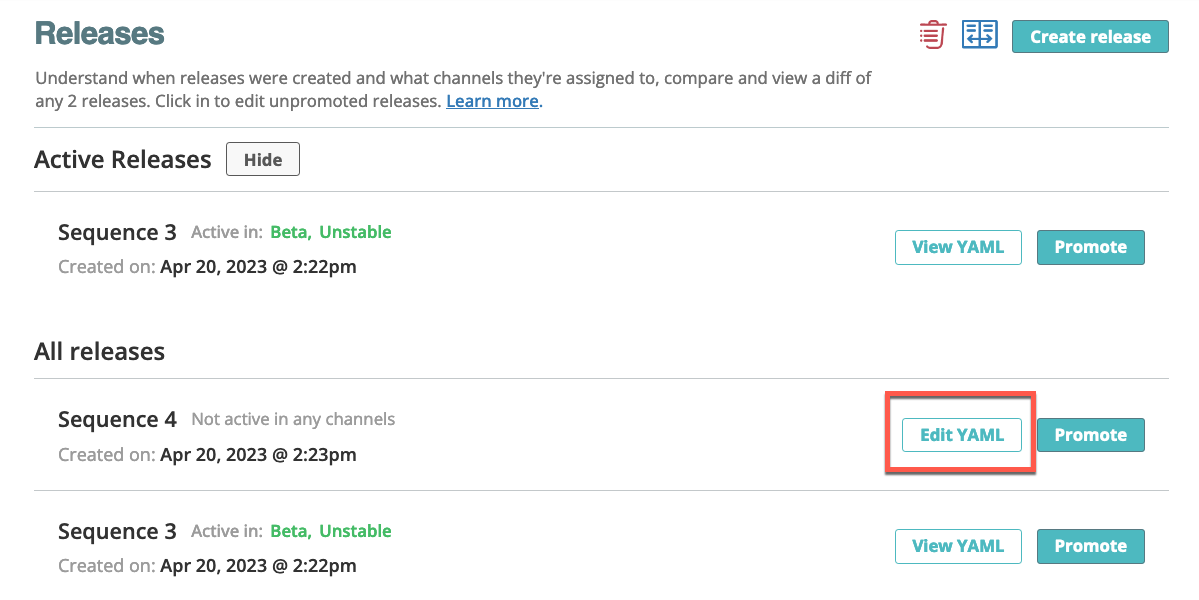
On the Releases page, find the draft release you want to edit and click Edit YAML.
-
Click Save to save your updated draft.
-
(Optional) Click Promote.
Edit release properties
You can edit the properties of a release at any time. For more information about release properties, see Release Properties and Required Releases in About Channels and Releases.
To edit release properties:
-
Go to Channels.
-
In the channel where the release was promoted, click Release History.
-
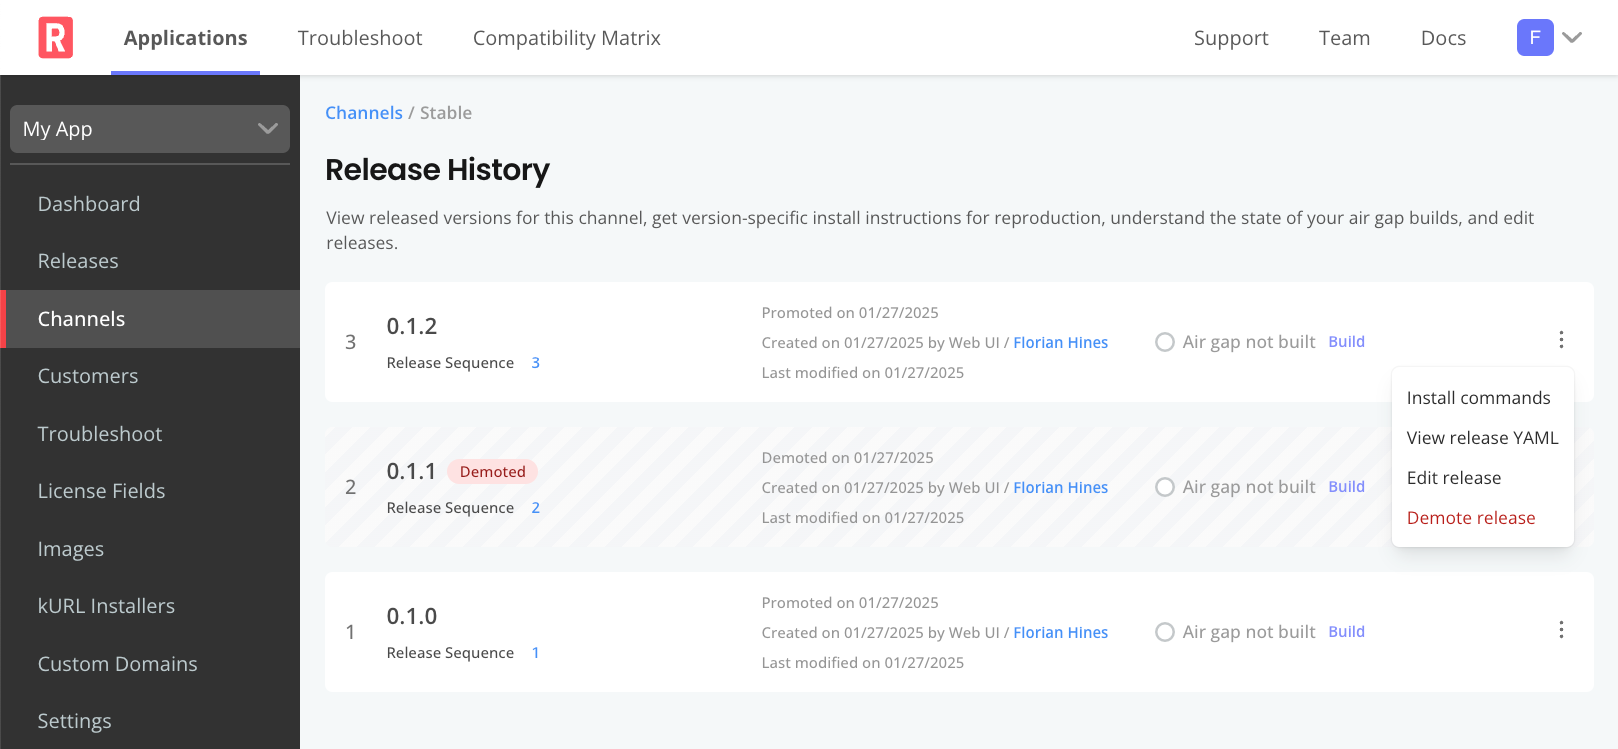
For the release sequence that you want to edit, open the dot menu and click Edit release.
-
Edit the properties as needed.
 note
noteFor information about disabling the Prevent this release from being skipped during upgrades option for a release that was previously marked as required, see Remove Release Requirement below.
-
Click Update Release.
Remove release requirement
You can disable the Prevent this release from being skipped during upgrades property for a release to remove the "required" label from the release in the Enterprise Portal.
Additionally, for online (internet-connected) installations using KOTS 1.126.0 or later (Embedded Cluster 2.10.0 or later), the requirement is removed from the Admin Console the next time that an upstream update check occurs.
For more information about working with required releases, see Required Releases in About Channels and Releases.
To remove the requirement from a release:
- Go to Channels.
- In the channel where the release was promoted, click Release History.
- For the release sequence that you want to edit, open the dot menu and click Edit release.
- Disable the Prevent this release from being skipped during upgrades option.
- Click Update Release.
To skip a previously-required release during upgrades, users must first update their installation to KOTS 1.126.0 or later (Embedded Cluster 2.10.0 or later).
Archive a release
You can archive releases to remove them from view on the Releases page. Archiving a release that has been promoted does not remove the release from the channel's Release History page or prevent KOTS from downloading the archived release.
To archive one or more releases:
- From the Releases page, click the trash can icon in the upper right corner.
- Select one or more releases.
- Click Archive Releases.
- Confirm the archive action when prompted.
Demote a release
A channel release can be demoted from a channel. When a channel release is demoted, the release is no longer available for download, but is not withdrawn from environments where it was already downloaded or installed. For more information, see Demotion in About Channels and Releases.
For information about demoting and un-demoting releases with the Replicated CLI, see channel demote and channel un-demote.
To demote a release in the Vendor Portal:
-
Go to Channels.
-
In the channel where the release was promoted, click Release History.
-
For the release sequence that you want to demote, open the dot menu and select Demote Release.
 View a larger version of this image
After the release is demoted, the given release sequence is greyed out and a Demoted label is displayed next to the release on the Release History page.