Create and edit channels
This topic describes how to create and edit channels using the Replicated Vendor Portal. For more information about channels, see About Channels and Releases.
For information about creating channels with the Replicated CLI, see channel create.
For information about creating and managing channels with the Vendor API v3, see the channels section in the Vendor API v3 documentation.
Create a channel
To create a channel:
-
From the Replicated Vendor Portal, select Channels from the left menu.
-
Click Create Channel.
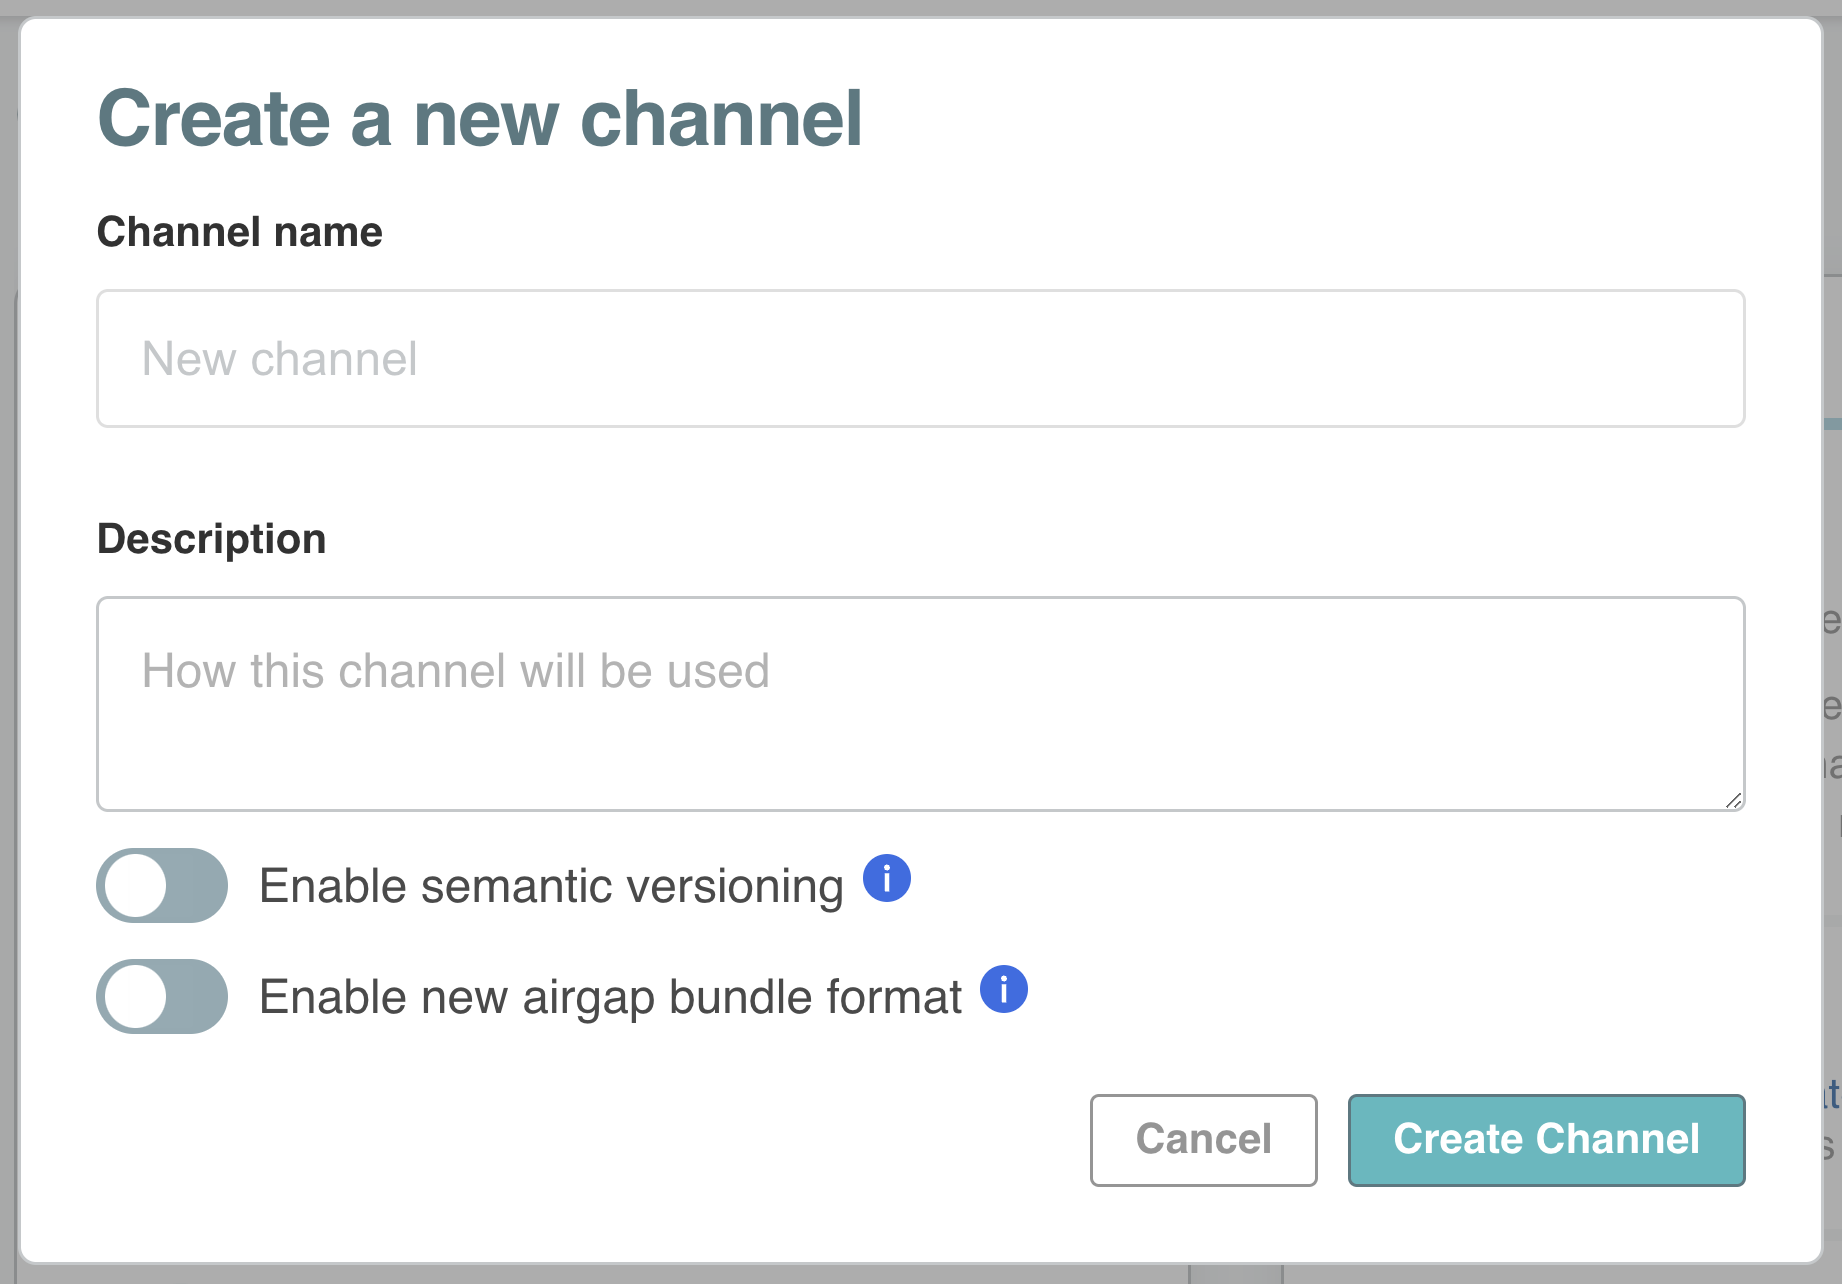
The Create a new channel dialog opens. For example:
-
Enter a name and description for the channel.
-
(Recommended) Enable semantic versioning on the channel if it is not enabled by default by turning on Enable semantic versioning. For more information about semantic versioning and defaults, see Semantic Versioning.
-
(Recommended) Enable an air gap bundle format that supports image digests and deduplication of image layers, by turning on Enable new air gap bundle format. For more information, see Use Image Tags and Digests.
-
Click Create Channel.
Edit channel settings
To edit the settings of an existing channel:
-
In the Vendor Portal, select Channels from the left menu.
-
Click the gear icon on the top right of the channel that you want to modify.
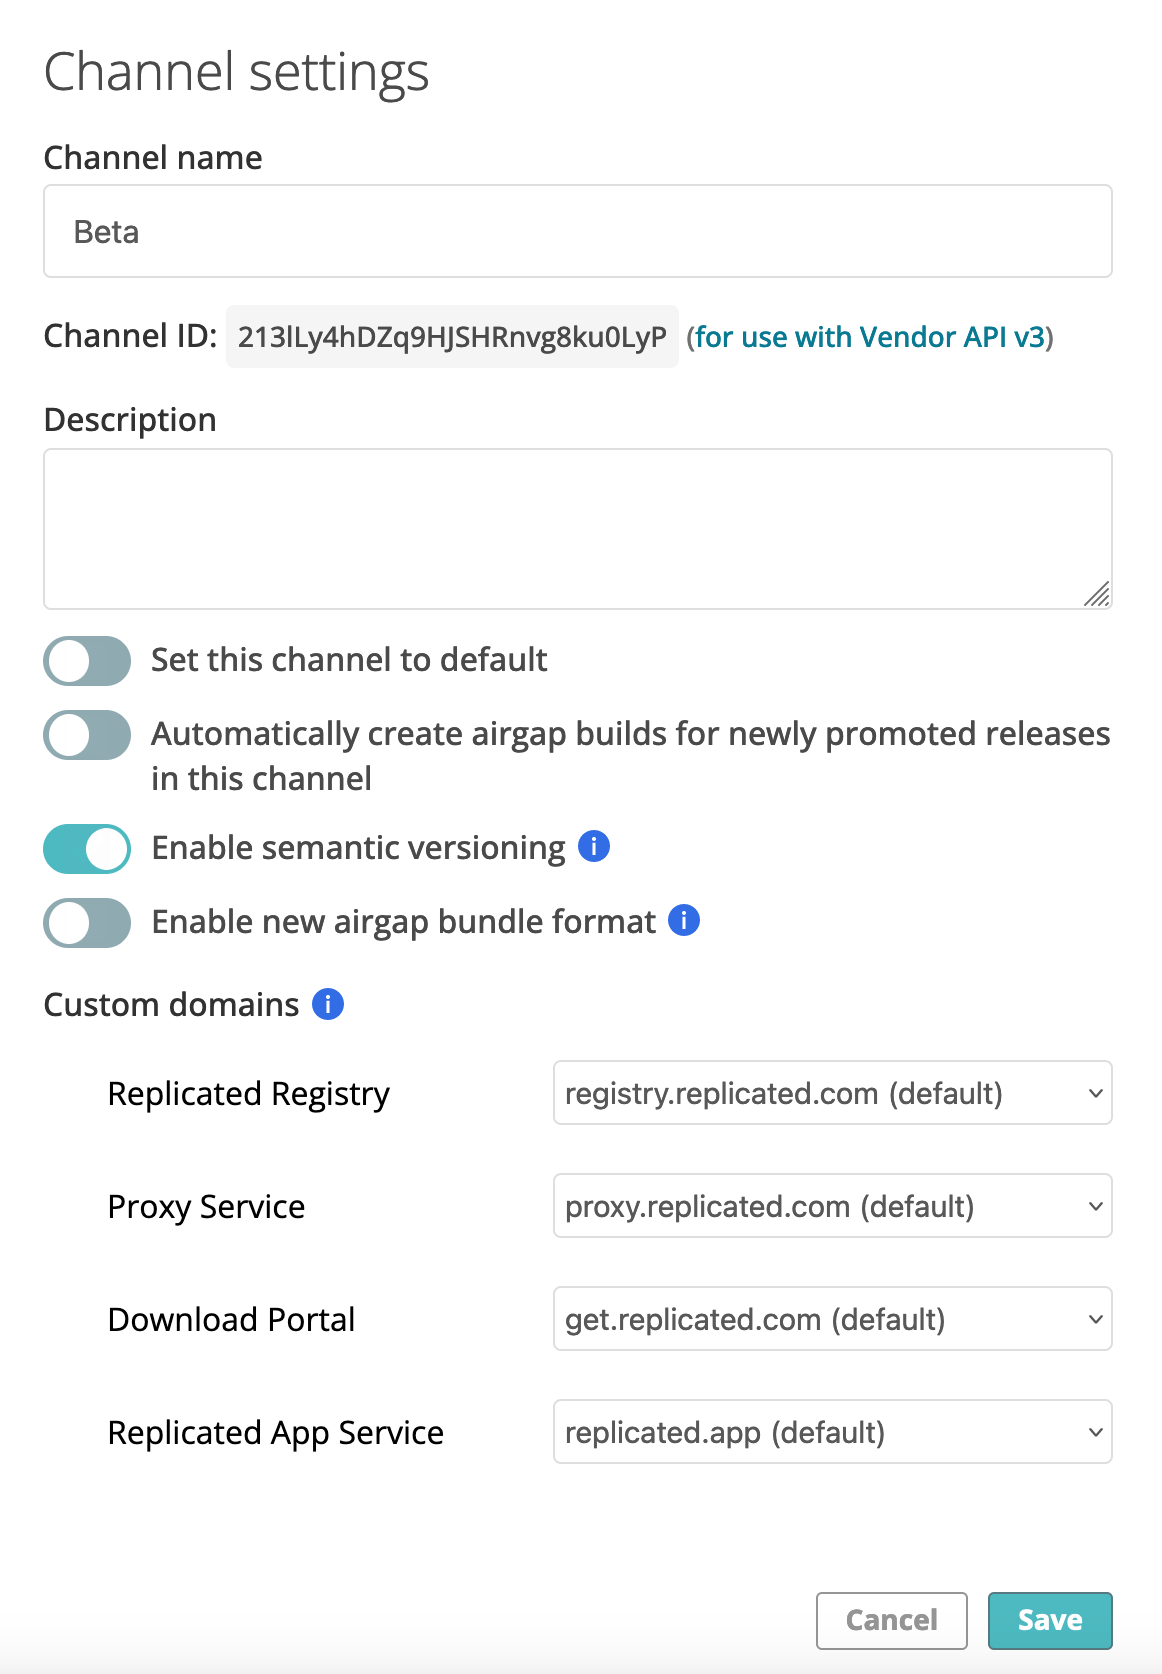
The Channel settings dialog opens. For example:
-
Edit the fields and click Save.
For more information about channel settings, see Channel Settings in About Channels and Releases.
Enable semantic versioning
You can enable and disable semantic versioning (SemVer) for releases on each channel. When you enable SemVer on a channel, the Vendor Portal checks all releases promoted to that channel to verify that the version label is valid SemVer.
You can enable SemVer on a channel that already has releases promoted to it that do not use semantic versioning. Any subsequently promoted releases must use semantic versioning. In this case, the channel will have releases with and without semantic version numbers. For more information, see About Using Semantic Versioning in About Channels and Releases.
If you enable SemVer for a channel and then promote releases to it, Replicated recommends that you do not later disable SemVer for that channel.
To enable semantic versioning on a channel:
-
In the Vendor Portal, go to Channels and click the Edit channel settings icon.
The Channel settings dialog opens. For example:
-
Enable the Enable semantic versioning toggle.
The next time that you promote a release to the channel, assign the release a semantic version number.
About customer channel assignment
Each customer is assigned to a single channel, which controls which releases they can access. You assign a channel when you create a customer, and you can change it at any time by editing the customer.
How a channel change takes effect depends on the customer's install type:
- Embedded Cluster, KOTS, kURL: The customer syncs their license in the Admin Console to fetch the latest release on the new channel. Required releases on the new channel are skipped during channel changes.
- Helm CLI: The customer's Helm commands resolve chart versions from the new channel. Helm does not detect or apply updates automatically. The customer must run
helm upgradeorhelm rollbackto move between releases. Helm ignores pre-release versions by default, so the customer must pass the--versionflag to install a pre-release.
For more information, see Customer Channel Assignment in About Customers and Licensing.
Archive a channel
You can archive an existing channel to prevent any new releases from being promoted to the channel.
You cannot archive a channel if:
- There are customers assigned to the channel.
- The channel is set as the default channel.
Assign customers to a different channel and set a different channel as the default before archiving.
To archive a channel with the Vendor Portal or the Replicated CLI:
- Vendor portal: In the Vendor Portal, go to the Channels page and click the trash can icon in the top right corner of the card for the channel that you want to archive.
- Replicated CLI:
-
Run the following command to find the ID for the channel that you want to archive:
replicated channel lsThe output of this command includes the ID and name for each channel, as well as information about the latest release version on the channels.
-
Run the following command to archive the channel:
replicated channel rm CHANNEL_IDReplace
CHANNEL_IDwith the channel ID that you retrieved in the previous step.For more information, see channel rm in the Replicated CLI documentation.
-