Define preflight checks
This topic describes how to define custom preflight checks for your application. For more information about preflight checks, see About Preflight Checks and Support Bundles.
Add a preflight spec to a release
You can define custom preflight checks for your application by adding a preflight spec to your Helm chart templates.
To add a preflight spec to a release for your application:
-
In your Helm chart
templatesdirectory, create a YAML file. Name the filepreflights.yamlor similar. -
In the YAML file, add the following to create a Kubernetes Secret with the label
troubleshoot.sh/kind: preflight:# templates/preflight.yamlapiVersion: v1kind: Secretmetadata:# the troubleshoot.sh/kind: preflight label is requiredlabels:troubleshoot.sh/kind: preflightname: "{{ .Release.Name }}-preflight-config" -
In the Secret, add a
stringDatafield with a key namedpreflight.yaml. This ensures thepreflightbinary can use this Secret when it runs from the CLI.# templates/preflight.yamlapiVersion: v1kind: Secretmetadata:labels:troubleshoot.sh/kind: preflightname: "{{ .Release.Name }}-preflight-config"stringData:# add a preflight.yaml key under stringDatapreflight.yaml: |apiVersion: troubleshoot.sh/v1beta2kind: Preflightmetadata:name: preflightsspec:collectors: []analyzers: [] -
Update
spec.collectorsandspec.analyzerswith any collectors and analyzers that you want to use in the preflight checks for your application. For common examples, see Examples of preflight specs.For the complete list of available collectors and analyzers, see the Collect and Analyze sections in the Troubleshoot documentation.
noteTroubleshoot automatically includes the clusterInfo and clusterResources collectors to gather information about the cluster and cluster resources. You do not need to manually include the
clusterInfoorclusterResourcescollectors in the specification.To use only the
clusterInfoandclusterResourcescollectors, delete thespec.collectorskey from the preflight spec. -
Test the preflight checks by running them in a cluster using the preflight plugin and Helm CLI. For information about how to install the preflight plugin and run preflight checks, see Run preflight checks for Helm installations.
-
From the root directory of your Helm chart, package the chart into a
.tgzarchive:helm package --dependency-update . -
Add the chart archive to a new release. Promote the release to an internal development channel, and install the release in a development environment to test your changes.
(Optional) Block installation with required (strict) preflights
For applications installed with a Replicated installer (Embedded Cluster, KOTS, kURL), you can set any preflight analyzer to strict: true. When you set strict: true, any fail outcomes for the analyzer block the deployment of the release.
Troubleshoot ignores strict preflight analyzers if the exclude property is also included and evaluates to true. See exclude in the Troubleshoot documentation.
The following image shows how a fail outcome appears when you set strict: true on an analyzer, which prevents installation from continuing if the preflight check fails:
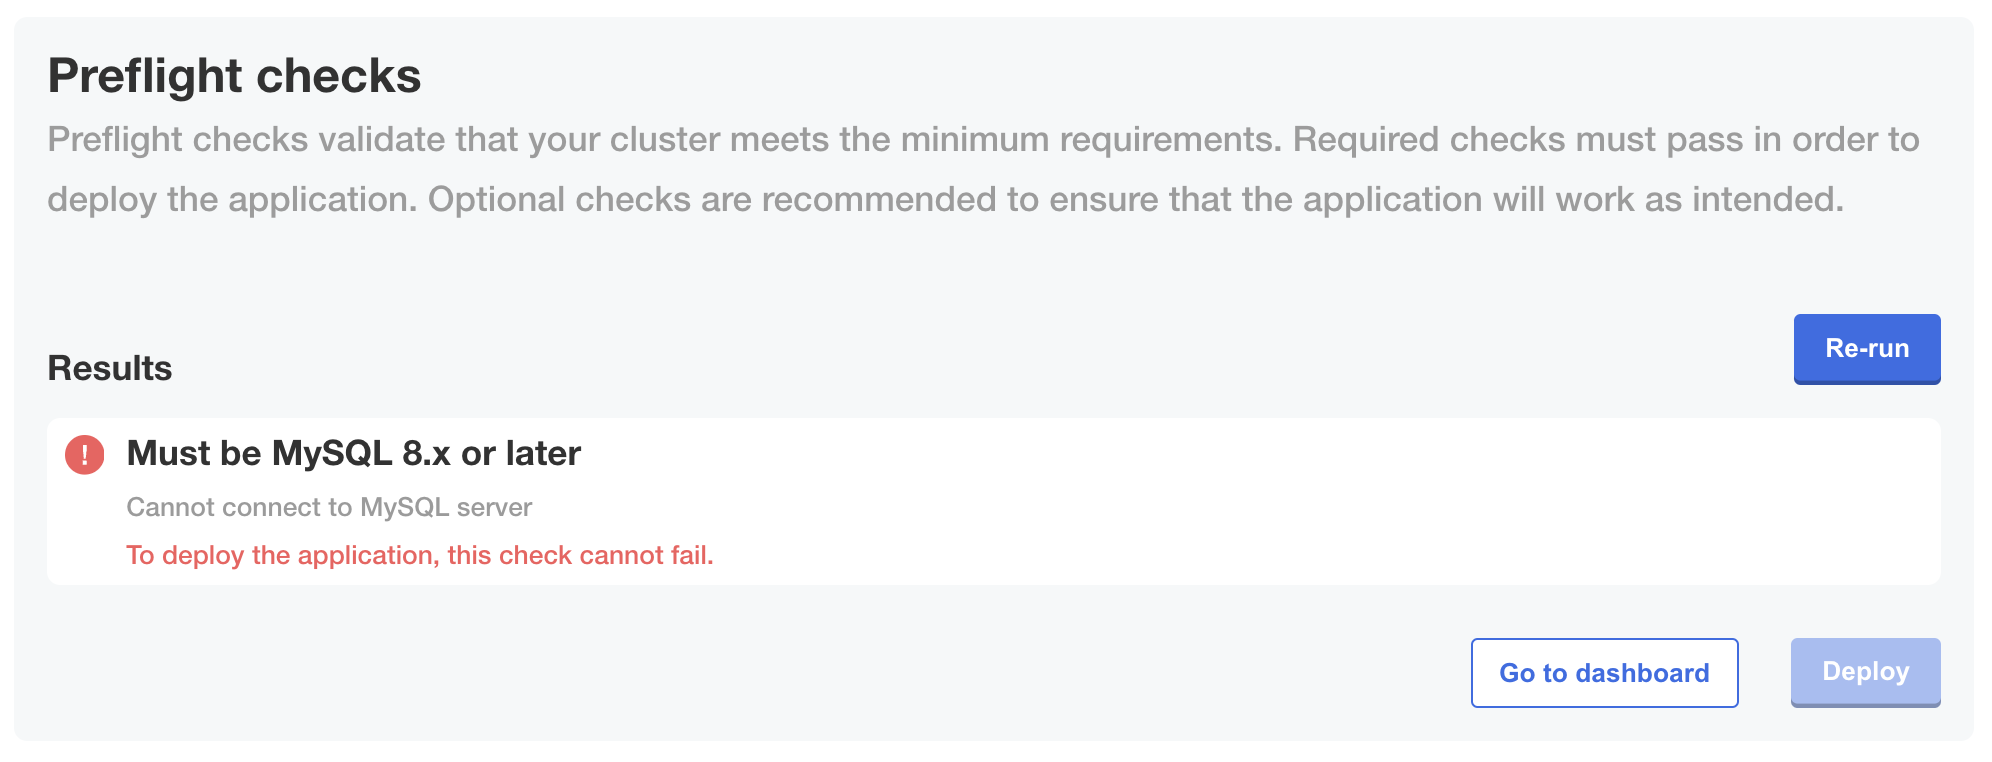
View a larger version of this image
Define preflights for non-Helm applications or KOTS v1.100.3 and earlier
For non-Helm applications or installations with KOTS v1.100.3 and earlier, add the Preflight custom resource to a YAML file at the root level of your release:
# preflights.yaml

apiVersion: troubleshoot.sh/v1beta2
kind: Preflight
metadata:
  name: preflights
spec:
  collectors: []
  analyzers: []
Customize the collectors and analyzers as desired.